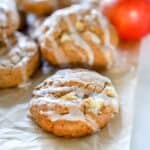
Gluten Free Apple Cookies
These gluten free apple cookies are a must fall cookie recipe. They are packed full of flavor from the warm spices, browned butter, juicy apple pieces and topped with maple glaze making them the perfect fall bake!
Servings: 12 Cookies
Calories: 209kcal
Ingredients
Ingredients for gluten free apple cookies
- 120 grams Unsalted butter
- 280 grams Gluten free all purpose flour
- 2 tablespoons Corn starch
- 1 teaspoon Ground cinnamon
- ¼ teaspoon Ground nutmeg
- ¼ teaspoon Ground ginger
- ½ teaspoon Baking powder Be sure to use gluten free baking powder as some brands may contain gluten.
- ½ teaspoon Baking soda
- ¼ teaspoon Salt
- ¼ teaspoon Xanthan gum Omit if the flour blend already contains xanthan gum.
- 1 large Egg Room temperature
- 1 teaspoon Vanilla extract
- 200 grams Light brown sugar
- 1 large Apple
Ingredients for maple glaze
- 50 grams Powdered sugar
- 1 tablespoon Maple syrup
- 1 tablespoon Milk
- ¼ teaspoon Vanilla extract
Instructions
How to make gluten free apple cookies
- Cut the butter into evenly sized cubes. This helps it melt and brown more evenly. Place the butter cubes in the saucepan over medium-low heat.
- Once the butter is completely melted, you'll notice tiny bubbles emerging on the surface. Stir consistently using a whisk.
- Watch for the butter to start foaming. While stirring, keep a keen eye on its color transformation—starting from yellow to a gentle tan, and finally achieving a golden brown hue. Typically, this process takes approximately 5-8 minutes.
- When the butter hits a rich, deep golden brown shade with small speckles at the pan's bottom and releases a nutty fragrance, swiftly take it off the heat. Ensure it doesn't surpass this point, as it can swiftly transition from nicely browned to burnt.
- To halt the cooking process and avoid overcooking the butter in the hot pan, transfer it to a heatproof bowl and let it cool for 10 minutes.
- In a separate bowl mix together flour, cornstarch, cinnamon, nutmeg, ginger, baking soda, baking powder, salt, xanthan gum and set aside.
- Once the butter has cooled in a large bowl mix together the sugar and browned butter until creamy.
- Add the vanilla extract and egg into the creamy mixture, then beat until thoroughly blended.
- Add the dry mix to the wet ingredients, and mix with a wooden spoon until it has all combined.
- Core and peel the apple and dice into small pieces.
- Add the diced apple into the dough by gently kneading them into the mixture, then pop it in the fridge for 15 minutes to let it firm up.
- Line 2 baking sheets with parchment paper.
- Use a cookie scoop or ice cream scoop to form cookie balls, each weighing 55g. Arrange them on the baking sheet and return the sheet to the fridge for an additional 15 minutes to allow further chilling.
- Preheat the oven to 170°C/325°F/Gas mark 3 while the cookies are chilling.
- Distribute the cookie balls evenly between the two baking sheets, ensuring approximately 2 inches of space between each cookie. Keep it to a maximum of 6 cookies per sheet to allow room for spreading.
- Place the baking sheet in the middle of the oven and bake for approximately 12-15 minutes, or until the cookie edges have a delicate, golden color. Take them out of the oven and allow them to cool on the baking sheet until they are completely cool and firm before transferring them to a cooling rack.
- For the best and most even baking results, place each baking sheet of cookies in the oven one at a time. Positioning them in the center of the oven generally ensures more consistent baking.
How to make the maple glaze
- Once the cookies have cooled make the glaze.
- Sieve powdered sugar into a small bowl. Add in the maple syrup, milk, and vanilla extract until it resembles a smooth paste.
- Using a small spoon drizzle the glaze over each cookie.
Notes
Recipe Tips
-
- Tip #1: High-Quality Ingredients - I always recommend using good-quality butter, pure vanilla extract, and your most loved chocolate chips. The better quality of ingredients will impact the end result of these gluten free apple cookies.
-
- Tip #2: Kitchen Scales - Opting for digital scales is advisable in baking. I consistently measure with scales and grams, recognizing the scientific nature of baking. When working with gluten-free recipes, accurate weighing of ingredients is crucial for optimal results. Affordable digital scales are readily accessible online, eliminating the need for expensive alternatives. (However, for smaller quantities, I rely on spoon measurements.)
-
- Tip #3: Browned butter - Monitor the butter closely as it browns, as it has the potential to burn rapidly. Once browned, promptly remove it from the heat and transfer it carefully to a bowl to ensure it cools immediately, preventing any further cooking in the hot pan.
-
- Tip #4: Wait until the brown butter has cooled as if it is still hot when the egg is added it will start to scramble the egg and we don't want that!
-
- Tip #5: Don't skip the chill time as this will make all the difference in how much the cookies spread in the oven. Preventing the cookies from becoming too thin and overly crispy.
-
- Tip #6: Leave the cookies to cool on the baking sheet as they will firm up as they cool.
Nutrition
Serving: 1serving | Calories: 209kcal | Carbohydrates: 33g | Protein: 1.5g | Fat: 7.5g | Saturated Fat: 4.7g | Polyunsaturated Fat: 0.1g | Monounsaturated Fat: 0.2g | Cholesterol: 15.5mg | Sodium: 107.2mg | Potassium: 26.7mg | Fiber: 0.6g | Sugar: 18.2g