Make this gluten free pie crust at home using only a few ingredients and no special equipment that results in a beautiful, flaky pie crust that is perfect for your favorite pie and tart fillings.
Using an easy folding technique called lamination for a beautiful gluten free dough that when baked is flaky, delicious, and doesn't fall apart.

If you are looking for a tried and tested gluten free pie crust for the holiday season or to make your favorite pies gluten free then this detailed recipe is packed full of tips and tricks that will have you making it perfect first time.
I have also included images below to guide you through the recipe and additional information and images for blind baking.
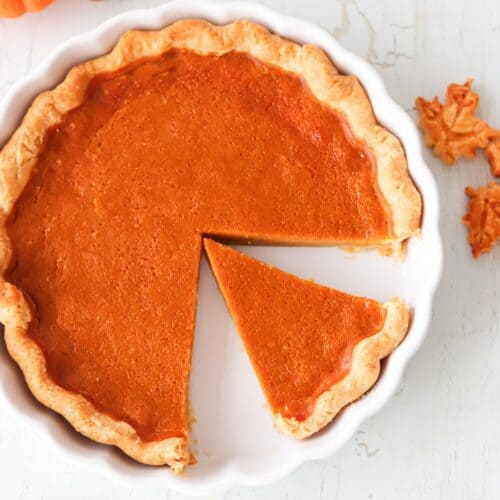
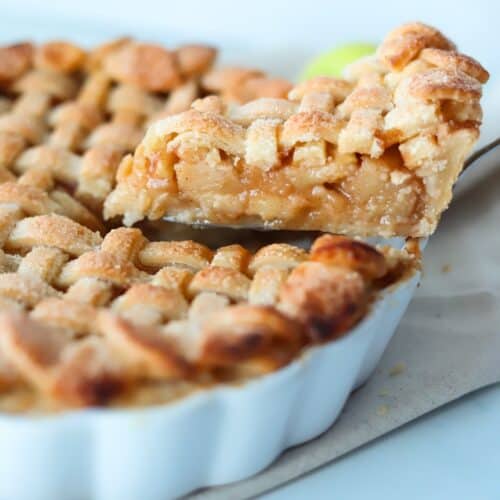
This recipe is a great base for your favorite pie dishes like a gluten free lemon meringue pie, gluten free apple pie, gluten free pumpkin pie, gluten free brownie pie, gluten free blueberry pie and many more!
It's also perfect for tarts such as a lemon tart, fruit tart, and a chocolate tart.
You can also omit the sugar, and it's great for savory recipes such as a gluten free quiche, meat pies, or a tomato tart.
You can also use it for making a gluten free galette, gluten free chocolate pop tarts or what about going all out for a fun breakfast with a giant pop tart.
Jump to:
⭐ Why we love this recipe
- Easy to make - don't be intimidated to make a homemade gluten free pie crust as it is much easier than you would think. I have also included step-by-step images to guide you through the recipe.
- No fancy equipment is needed - this recipe uses only a large bowl, rolling pin, rubber spatula, and plastic wrap.
- Flaky texture - using the lamination method results in an airy, flaky pie crust that is firm enough to hold a pie filling.
- Doesn't leak in the oven - no greasy pie crust here!
- Gluten free ingredients - tried and tested recipe that even non gluten free eaters can't tell your pie is gluten free.
Recipe Development
I tested this recipe many times over the years. Adjusting the butter, water, and flour ratios slightly every time till you have this recipe that I am sharing with you.
I wanted a flaky gluten-free pie crust that could be made ahead of time and stored in the fridge for a day or two before baking to use in my pies for the holiday season.
This recipe uses a process called lamination (don't be put off by this as it is so easy to do). Lamination is a process of rolling and folding the dough to create layers of fat and dough that result in an airy, flaky texture.
Unlike my gluten free shortcrust pastry this gluten free pie dough requires no kneading and this is exactly what to avoid when making this recipe, as this would lead to a dense, tough pie dough.
I have included lots of tips and tricks below that I have learned over the years to help you make this gluten free pie crust perfect first time!
📋 Ingredients Notes

- Gluten free All Purpose Flour - AKA Gluten free plain flour. I used Doves free from plain flour, but you can use your preferred brand of gluten free All purpose flour.
- Sugar - This recipe doesn't taste overly sweet and uses very little sugar. This helps with the flavor and for the pie to have a golden brown color. Omit the sugar if you don't require a sweet crust.
- Xanthan gum - if the flour blend contains xanthan gum reduce this to ½ teaspoon.
- Salt - a small amount of salt makes a big difference in the flavor.
- Cold unsalted butter - cut the butter into cubes. If you are using salted butter them omit the additional salt.
- Cold water - I like to pop the water in the fridge or freezer before using it until it is cold but not turning to ice.
See the recipe card below for ingredient measurements.
🥣 Step by Step Instructions
Below is a brief step-by-step process with photos of how to make a gluten free pie crust.
See the recipe card below for more detailed recipe instructions.
Making the Pie Dough

Step 1: Add the flour, sugar, and xanthan gum, into a large bowl and mix together.
Step 2: Place the cubed butter into the bowl and coat all the pieces with flour. Using your fingers, press the butter into the flour until the cubes of butter are around large pea-sized, leaving some pieces of butter slightly larger.
Step 3: Add the cold water a few tablespoons at a time and mix into the butter and flour mixture. Continue this until the dough comes together well but is not wet and sticky (I used 100 grams of water, if it is too dry slowly adding additional water if needed).
Step 4: Squeeze the dough together to make a rectangular shape. Wrap in plastic wrap and place the dough in the fridge to rest and chill for around 1 hour.
Tip: Work quickly as you want to keep the butter cold and not melt during this step. Do not knead the dough, as we want to see chunks of butter within the dough see image 4.
Folding the Pie Dough
These steps are called lamination which involves rolling and folding the dough several times to create layers within the dough which will result in a flaky tender pie crust when baked.

Step 5 -13: Roll out the dough into a lightly floured surface. Brush any excess flour off the top of the dough.
Fold the the dough into thirds like a letter. Rotate the dough and roll out into a rectangle shape again, and then repeat the letter folds. Repeat this one more time.
Roll out the dough until it is around 10 inches long and 1 inch thick.
Divide the dough in half.
Tip: Be sure the butter doesn't start melting into the dough during the lamination process. If your kitchen is warm and you feel that the dough is getting too soft to handle, you can return it to the fridge for 10 minutes but by working fast this usually isn't an issue.
Storing the Dough

Step 5: Shape both pieces of dough into a disk shape.
Step 6: Wrap each disk well with plastic and place them in the fridge for at least 1 hour, longer if the kitchen is warm. Each disk will cover a 9-inch pie dish, or you can use both one for the bottom pie crust and the other for the pie top.
The dough can be kept in the fridge for up to 3 days or in the freezer for up to 3 months.
Tip: If the pie dough has been resting for more than 2 hours or overnight you may need to let it rest for around 15-30 minutes, depending on how warm the kitchen is at room temperature, before rolling it out and ready to use in your recipe.
Blind Baking the Pie Dough
What is Blind Baking?
Blind baking involves pre-baking the pie crust before adding the filling. The crust is docked and lined with parchment paper, then weighed down with pie weights or dried beans to prevent it from puffing up during baking.
Once the crust is partially baked, the parchment paper and pie weights are removed, the partially baked crust is great for when making a recipe that is going to have a filling and then placed back into the oven to fully bake, such as my gluten free quiche, and gluten free pumpkin pie.
For a fully baked pie crust, after the pie weights and parchment paper are removed, it is placed back into the oven to fully bake. This is great for adding a filling that doesn't require any baking, such as my gluten free chocolate tarts, and gluten free lemon meringue pie.

Step 16: Rolling out - Roll out evenly until it is around a 12-inch circle. To make rolling the pie dough easier, I like to roll it out parchment paper or Plastic wrap.
This will prevent it from sticking, and there is no need for extra flour on your surface, which prevents the pastry from drying out. It also makes the dough easier to lift onto the pie dish by lifting up the plastic wrap and then flipping it over the pie dish.
Step 17: Carefully transfer the dough without stretching it onto the pie dish. Gently press the dough into the bottom and sides of the dish.
Step 18: Trim any excess dough around the edges of the pie dish leaving around 1 inch around the edge of the dish. Fold and tuck the excess dough around the inner edge of the pie dish. This will make a neat, thicker crust around the edge of the pie that is easier to shape.
Step 19: Crimp the edge of the crust. The shape of the crimp is your own personal style or preference. I like to use my fingers by creating a small v shape around the edges but you can also use a crimping tool or a fork.
Place the pie dish in the fridge to chill for 30 minutes.
Preheat the oven to 220°C/425°F.
Tip: Chilling the dough after it is placed in the dish will help it firm back up and prevent shrinking during baking.

Step 20: After the dough has chilled, using a fork dock the base of the pie crust by pricking the bottom of the pie crust several times. This will allow steam to escape and help prevent it from puffing up and helps the bottom stay flat in the dish.
Step 21: Line the pie crust with parchment paper leaving some overlap over the sides of the pie dish. Gently fill it using ceramic baking beads, uncooked rice or beans. Be sure to get all the pie weights up to the edge of the crust.
Bake in the oven for approx 15-20 minutes until the edges of the pie crust are starting to turn a light golden brown.
Step 22: Carefully remove the oven and remove the parchment paper with the pie weights.
Reduce the oven temperature to 190°C/375°F.
Step 23: For a par-baked crust - return to the oven for a further 5 minutes. The bottom will be firm but not yet golden brown.
For a fully blind baked crust - Return to the oven after removing the parchment paper for a further 15-20 minutes until the pie crust is a beautiful golden brown color.
Tip: By trimming the parchment paper to have excess paper over the sides of the pie dish will make it easier when lifting the parchment paper. The pie weights will be hot, and you can lift them out using the excess paper.

The pie shell should be easily removed from the pie dish and be golden brown on the bottom when it is fully blind-baked.
💡 Pro Recipe Tips
- Tip #1: Use cold ingredients - I cut the butter into cubes and water into a jug and then place them in the fridge for an hour before making the dough as it ensures they are nice and cold.
- Tip #2: Weighing the ingredients - Using a digital scale makes all the difference in baking and I use it in all my recipes as it's the most accurate. If you don't have a scale you can easily purchase one cheaply online.
- Tip #3: Don't knead the dough - We are just mixing it together with our hands or a spatula when adding the cold water. The dough will be using the lamination method to ensure a flaky pie crust, and we need chunks of butter in the dough before starting this process and don't want the butter melting.
- Tip #4: Chilling the dough - The dough is chilled a couple of times in this recipe. It is necessary for various reasons, as the butter needs to remain cold to achieve a flaky texture and not turn out greasy. It also makes the dough easier to work with. Chilling before blind baking also helps prevent it from shrinking in the oven.

❔ Recipe FAQs
The dough can be kept wrapped in the fridge for up to 3 days or in the freezer for up to 3 months.
Yes, It can be made up to 3 days before using in your pie recipe. I often make it the day before and store it well-wrapped in the fridge. I remove it from the fridge 20 minutes before rolling out.
This is one of the recipes I have not yet tried making dairy-free. I will test a gluten free dairy free pie dough in the future.
More Gluten Free Pie Recipes


If you tried this gluten free pie crust recipe. Please leave a star 🌟 rating in the recipe card below & a review in the comments section further down the page. Subscribe and get free recipes straight to your inbox.
📖 Recipe

Gluten Free Pie Crust
Nutritional information is meant as a guideline and all information is approximate.
Ingredients
Ingredients for gluten free pie crust
- 360 grams Gluten free All Purpose Flour AKA Gluten free plain flour
- 1 tablespoon Sugar Omit the sugar if you don't require a sweet crust.
- 1 teaspoon Xanthan gum if the flour blend contains xanthan gum reduce this to ½ teaspoon
- ¼ teaspoon Salt
- 250 grams Cold unsalted butter cut into cubes
- 110 grams Cold water extra if needed
Instructions
How to make gluten free pie dough
- Add the flour, sugar, and xanthan gum, into a large bowl and mix together.
- Place the cubed butter into the bowl and coat all the pieces with flour. Using your fingers, press the butter into the flour until the cubes of butter are around large pea-sized, leaving some pieces of butter slightly larger (work quickly as you want to keep the butter cold and not melt during this step). See images in the post above for reference if needed.
- Add the cold water a few tablespoons at a time and mix into the butter and flour mixture. Continue this until the dough comes together well but is not wet and sticky (I used 100 grams of water, if it is too dry slowly adding additional water if needed). Do not knead the dough, as we want to see chunks of butter within the dough see image 4 in the post above.
- Squeeze the dough together to make a rectangular shape. Wrap in plastic wrap and place the dough in the fridge to rest and chill for around 1 hour.
How to laminate the pie dough
- Roll out the dough onto a lightly floured surface. Brush any excess flour off the top of the dough.
- Fold the the dough into thirds like a letter. Rotate the dough and roll out into a rectangle shape again, and then repeat the letter folds. Repeat this one more time.
- Roll out the dough until it is around 10 inches long and 1 inch thick.
- Divide the dough in half and shape into a disk. Wrap each disk well with plastic and place them in the fridge for at least 1 hour, longer if the kitchen is warm. Each disk will cover a 9-inch pie dish, or you can use both one for the bottom pie crust and the other for the pie top.
- The dough can be kept in the fridge for up to 3 days or in the freezer for up to 3 months.
- If the pie dough has been resting for more than 2 hours or overnight you may need to let it rest for around 15-30 minutes, depending on how warm the kitchen is at room temperature before rolling it out.
- The dough is now ready to use. I have included images and directions in the post above for rolling out the dough to use in a 9-inch pie dish, par baking, and fully blind baking the gluten free pie crust.
Notes
- Tip #1: Use cold ingredients - I cut the butter into cubes and water into a jug and then place them in the fridge for an hour before making the dough as it ensures they are nice and cold.
- Tip #2: Weighing the ingredients - Using a digital scale makes all the difference in baking and I use it in all my recipes as it's the most accurate. If you don't have a scale you can easily purchase one cheaply online.
- Tip #3: Don't knead the dough - We are just mixing it together with our hands or a spatula when adding the cold water. The dough will be using the lamination method to ensure a flaky pie crust, and we need chunks of butter in the dough before starting this process and don't want the butter melting.
- Tip #4: Chilling the dough - The dough is chilled a couple of times in this recipe. It is necessary for various reasons, as the butter needs to remain cold to achieve a flaky texture and not turn out greasy. It also makes the dough easier to work with. Chilling before blind baking also helps prevent it from shrinking in the oven.
Nutrition
Disclaimer
Nutritional information is meant as a guideline and is always an approximate calculation. Recipes may include information of various products used. It is your responsibility to check that ingredients you use when making a recipe are gluten free.


Amanda says
Thank you for visiting. I hope you love the recipe!
LAWANDA LEWIS says
THANKS