These homemade gluten free ladyfingers, also known as savoiardi or sponge fingers are light and airy on the inside and beautifully crisp on the outside. You will be surprised at just how easy they are to make!
The gluten free ladyfingers can be enjoyed dipped in coffee or hot chocolate or used to make a gluten free tiramisu or trifle. They are superior to any store-bought lady fingers.

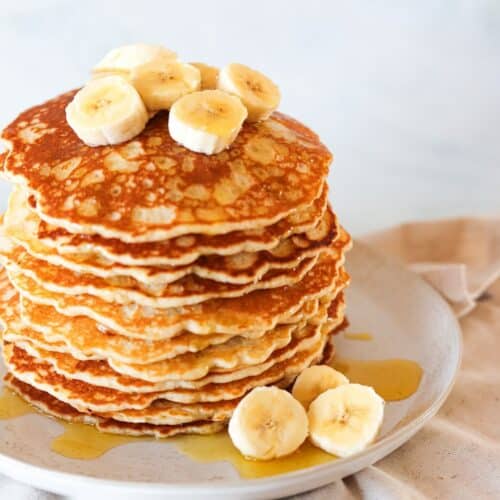
If you are looking for more homemade gluten free bakes then you will love these gluten free shortbread cookies, gluten free apple cookies, and gluten free brown butter chocolate chip cookies.
Jump to:
⭐ Why we love this recipe
- Gluten Free Ingredients - Only uses gluten free ingredients. These gluten-free ladyfingers use simple ingredients that are usually pantry staples. Not only will no one guess they are gluten free but in my opinion rival store-bought ladyfingers.
- Easy to Make - If you are making them for the first time, don't be intimidated you will be surprised at just how easy they are to make.
- Flavor and Texture - The subtle flavor combined with the light and airy sponge fingers with a crisp exterior are perfect for dipping in coffee or hot chocolate or used in desserts such as tiramisu.
What are Ladyfingers?
Ladyfingers are an Italian cookie, also known as savoiardi. They are light and airy sponge fingers with a slightly crisp exterior. Although they are also known as ladyfinger cookies, or biscuits, depending on where you are from in the world, but they have more of a cake-like texture interior.
Their name Savioiardi, comes from the region of Savoy (Savoia) in Northern Italy. They were created in The House of Savoy in the 19th century.
Ladyfingers or savoiardi are delicious served with fresh coffee but are more commonly used in desserts such as tiramisu, zuppa inglese, Charlotte cake and trifle.
📋 Ingredients Notes

- Eggs - Always use fresh room temperature eggs. To make ladyfingers the egg whites and egg yolks are whipped up separately.
- Sugar - The sugar is separated using half in the egg white mix and half in the egg yolk mix. I have tested with both granulated and superfine sugar, both work well, but I prefer to use superfine sugar.
- Vanilla extract - I like to add vanilla extract to my recipe because it adds a subtle yet delicious depth of flavor, enhancing the overall taste and making the gluten free ladyfingers even more delightful.
- Salt - enhances and helps balance out the flavors.
- Gluten free all purpose flour - I used a shop bought Gluten free Plain flour blend from Doves Farm Freee from range. Which is a flour blend of Rice, Potato, Tapioca, Maize and Buckwheat flour. I have had reports that others have used other Gluten free All purpose blends with my recipes that have worked well.
- Corn starch - Adds additional stability and texture to the ladyfingers. For more information on corn starch see my corn starch v corn flour post.
- Powdered sugar for dusting. Don't skip this step as the dusting of sugar will help the ladyfingers rise and prevent them from spreading.
See the recipe card below for ingredient measurements.
🥣 Step by Step Instructions
Below is a brief step-by-step process with photos of how to make gluten free ladyfingers.
See the recipe card below for more detailed recipe instructions.
Make the Gluten free Ladyfinger Batter

Step 1: Preheat the oven to 175℃/350℉. Line 2-3 baking sheets with parchment paper.
Separate the egg yolks and the egg whites into two separate bowls.
Step 2: With an electric whisk or stand mixer on a low speed, whip the egg whites until small bubbles appear for approximately 1-2 minutes (See image 2). Then gradually add in ½ of the sugar and salt.
Tip: Be careful not to get any egg yolk into the egg whites, as this will prevent them from whipping up well.

Step 3: Turn up the mixer to high speed and whip until glossy with stiff peaks (See image 3).
Step 4: In a separate bowl with clean beaters, whisk the egg yolks, remaining sugar, and vanilla until it is thick, fluffy, and light in color.
Tip: The egg white mix should stand up straight when you lift out the beaters.

Step 5: Gently fold ¼ of the egg white mixture into the egg yolk mixture at a time with a spatula until all the egg white mix and yolk mix are combined and no streaks appear.
Step 6: Sift in the gluten free flour, corn starch and xanthan gum into the egg mixture, Carefully folding until no steaks of flour can be seen.
Tip: Be careful not to deflate the batter during this process.
Pipe and Bake the Ladyfingers


Step 7: Transfer the batter to a piping bag fitted with a plain round tip.
Step 8: Pipe the batter onto the baking sheets around 4 inches long, leaving a 1½ inch gap between each finger (See image 8).
Tip: To achieve uniform ladyfingers, you can use a ruler to draw straight lines on the parchment paper as a guide. Once done, flip the parchment over so the lines are facing down. The lines will still subtly show through, providing you with a perfect template for piping evenly-sized ladyfingers.
Step 9: Generously dust the fingers with powdered sugar (This will help the fingers rise and reduce them spreading too much).
Step 10: Bake in the oven for 12-15 minutes until they are slightly golden and the edges are lightly browned. I bake one baking sheet at a time and repeat with the remaining baking sheets while the others are cooling. The longer you bake the ladyfinger the more crisp they will be (If you prefer crispier ladyfingers bake for a few minutes longer).
💡 Pro Recipe Tips
- Tip #1: Clean all bowls and equipment well before use, as we don't want any oil or grease, as this can affect the stabilizing of the whipped egg whites. I use a piece of paper towel with a little lemon juice, run it over the bowl's surface, whisk, and then dry it well before use.
- Tip #2: Use fresh room temperature egg whites as this is essential to get a light and fluffy texture.
- Tip #3: Take care separating the egg whites from the yolks as you do not want any yolk in the egg whites as this will result in the egg whites not whipping well.
- Tip #4: The egg white mix should stand up straight when you lift out the beaters as this helps create a structure that will hold shape during the baking process.
- Tip #5: Be careful not to deflate the batter during the folding process as you don't want to lose all the air that was added during the whipping process as you want to maintain that light airy texture.
- Tip #6: To achieve uniform ladyfingers, you can use a ruler to draw straight lines on the parchment paper as a guide. Once done, flip the parchment over so the lines are facing down. The lines will still subtly show through, providing you with a perfect template for piping evenly sized ladyfingers.
- Tip #7: If you prefer a crispier ladyfingers you can bake for a few minutes longer.
Now you have your ladyfingers you can use them to make a gluten free tiramisu or add a layer of ladyfingers to this speculoos tiramisu.

❔ Recipe FAQs
These sponge fingers are best stored in an airtight container for up to 5 days.
Yes, They can be made a few days in advance. Great if you plan on using them in a gluten free tiramisu or trifle.
I haven't tested freezing them, but if you want to try I recommend freezing them in an airtight container or freezer bag. Defrosting at room temperature.
More gluten free recipes
If you tried this gluten free ladyfingers recipe. Please leave a star 🌟rating in the recipe card below & a review in the comments section further down the page. Subscribe and get free recipes straight to your inbox.
📖 Recipe

Gluten Free Ladyfingers
Nutritional information is meant as a guideline and all information is approximate.
Equipment
- Bowls
- Baking sheets
- Parchment paper
- Stand mixer or electric whisk
- Piping nozzle & bag
Ingredients
Ingredients for gluten free ladyfingers
- 4 large Eggs (Separated) Room temperature.
- 130 grams Sugar (Divided) 65g for egg white mix and 65g for egg yolk mix.
- ½ teaspoon Vanilla extract
- ¼ teaspoon Salt
- 160 grams Gluten free all purpose flour
- 1 tablespoon (10g) Corn starch
- ¼ teaspoon Xanthan gum Omit if flour blend already contains xanthan gum.
- Powdered sugar for dusting
Instructions
How to make gluten free ladyfingers
- Preheat the oven to 175℃/350℉. Line 2-3 baking sheets with parchment paper.
- Separate the egg yolks and the egg whites into two separate bowls. Be careful not to get any egg yolk into the egg whites, as this will prevent them from whipping up well.
- With an electric whisk or stand mixer on a low speed, whip the egg whites until small bubbles appear (approx 1-2 minutes). Then gradually add in ½ of the sugar and salt.
- Turn up the mixer to high speed and whip until glossy with stiff peaks. The egg white mix should stand up straight when you lift out the beaters.
- In a separate bowl with clean beaters, whisk the egg yolks, remaining sugar, vanilla until it is thick, fluffy and light in color.
- Gently fold ¼ of the egg white mixture into the egg yolk mixture at a time with a spatula until all the egg white mix and yolk mix are combined and no streaks appear (Be careful not to deflate the batter during this process).
- Sift in the gluten free flour, corn starch and xanthan gum into the egg mixture, Carefully folding until no steaks of flour can be seen.
- Transfer the batter to a piping bag fitted with a plain round tip. Pipe the batter onto the baking sheets around 4 inches long, leaving a 1½ inch gap between each finger. (To achieve uniform ladyfingers, you can use a ruler to draw straight lines on the parchment paper as a guide. Once done, flip the parchment over so the lines are facing down. The lines will still subtly show through, providing you with a perfect template for piping evenly-sized ladyfingers).
- Generously dust the fingers with powdered sugar (This will help the fingers rise and reduce them spreading too much).
- Bake in the oven for 12-15 minutes until they are slightly golden and the edges are lightly browned. I bake one baking sheet at a time and repeat with the remaining baking sheets while the others are cooling. The longer you bake the ladyfinger the more crisp they will be (If you prefer crispier lady fingers bake for a few minutes longer).
- Leave to cool on the baking sheet. once cool, store in an airtight container to help keep them fresh and crisp.
Notes
- Tip #1: Clean all bowls and equipment well before use, as we don't want any oil or grease, as this can affect the stabilizing of the whipped egg whites. I use a piece of paper towel with a little lemon juice, run it over the bowl's surface, whisk, and then dry it well before use.
- Tip #2: Use fresh room temperature egg whites as this is essential to get a light and fluffy texture.
- Tip #3: Take care separating the egg whites from the yolks as you do not want any yolk in the egg whites as this will result in the egg whites not whipping well.
- Tip #4: The egg white mix should stand up straight when you lift out the beaters as this helps create a structure that will hold shape during the baking process.
- Tip #5: Be careful not to deflate the batter during the folding process as you don't want to lose all the air that was added during the whipping process as you want to maintain that light airy texture.
- Tip #6: To achieve uniform ladyfingers, you can use a ruler to draw straight lines on the parchment paper as a guide. Once done, flip the parchment over so the lines are facing down. The lines will still subtly show through, providing you with a perfect template for piping evenly sized ladyfingers.
- Tip #7: If you prefer a crispier ladyfingers you can bake for a few minutes longer.
Nutrition
Disclaimer
Nutritional information is meant as a guideline and is always an approximate calculation. Recipes may include information of various products used. It is your responsibility to check that ingredients you use when making a recipe are gluten free.


Amanda says
Thank you for visiting. I hope you liked the recipe.