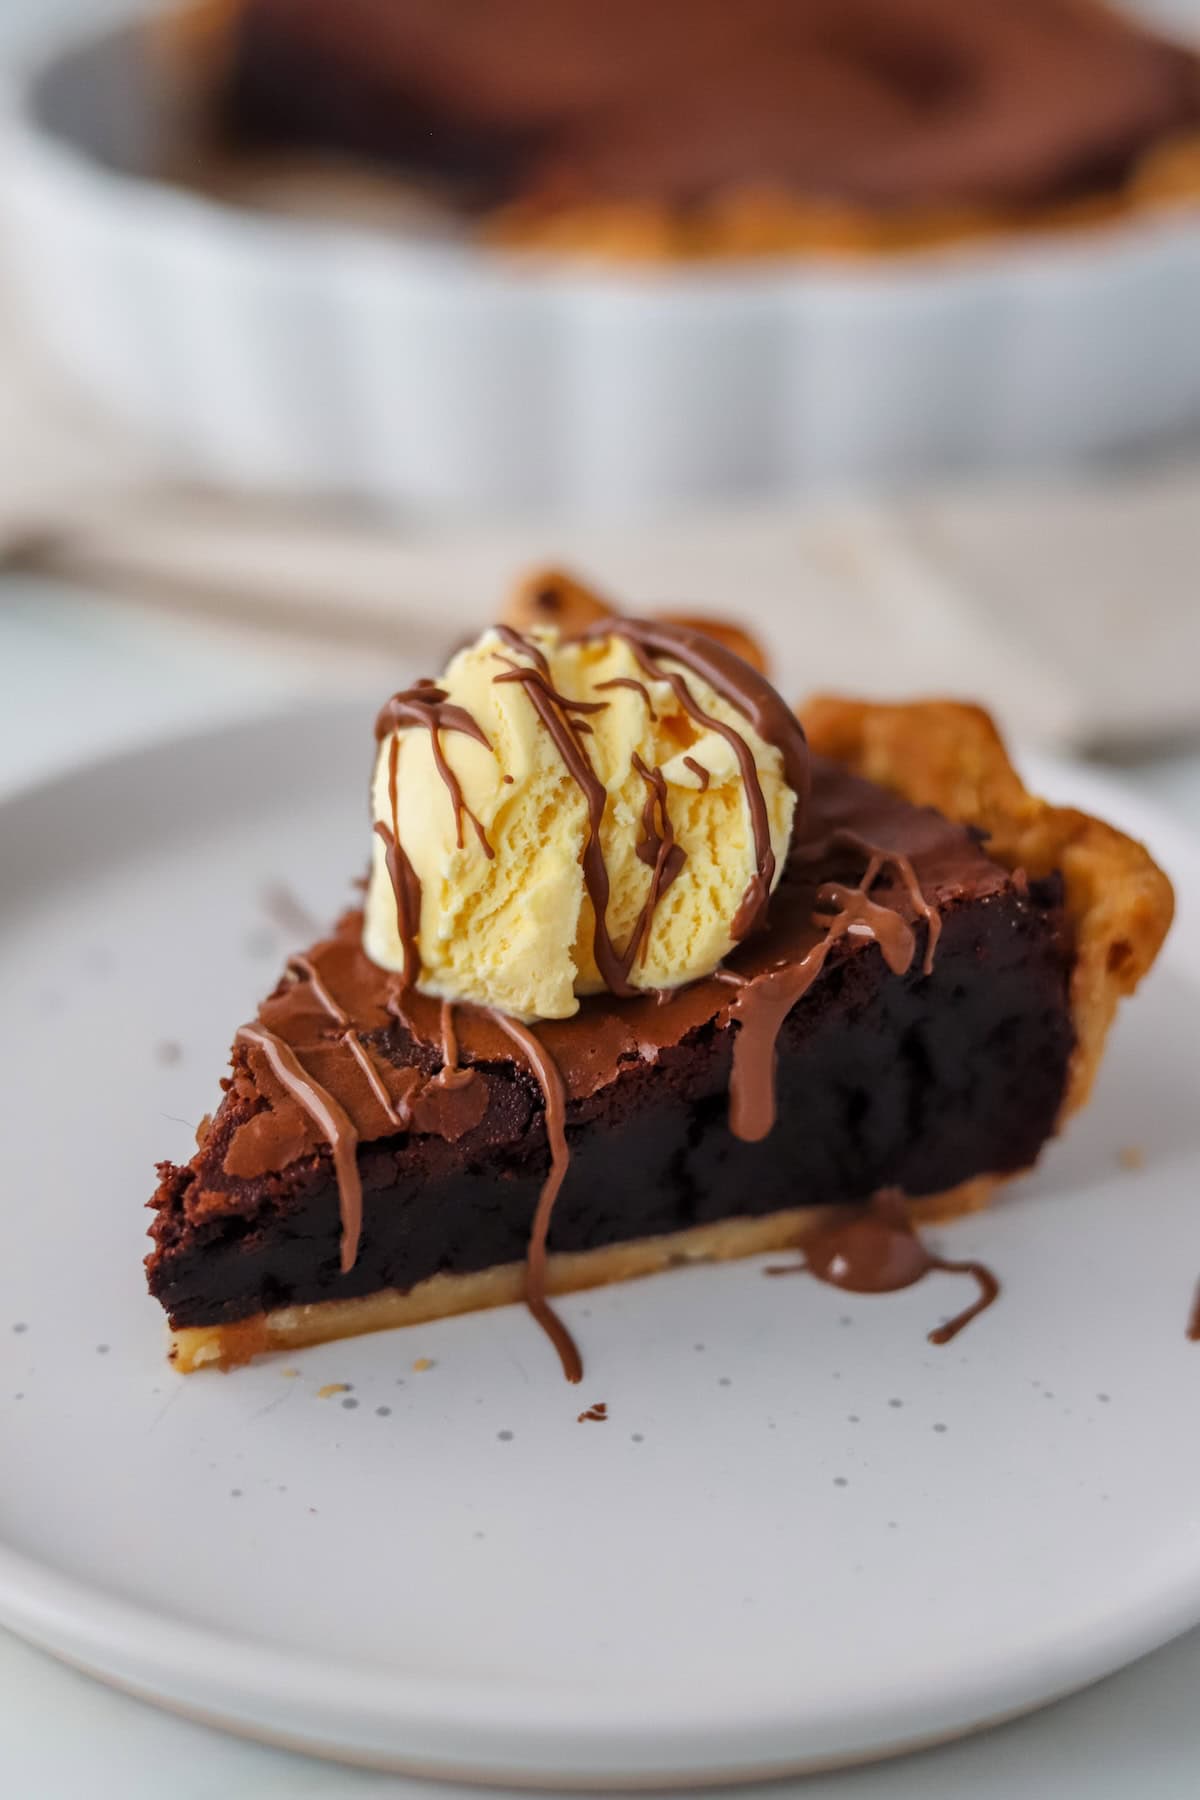
This Gluten free Brownie Pie is two great recipes combined into one. A beautiful flaky pie crust filled with a rich fudgy chocolate brownie. A brownie in pie form is just the perfect dessert and can be served warm or at room temperature.
This gluten free brownie pie is the perfect dessert if you are looking for something a little different for Thanksgiving or Christmas dessert. It's also great in the summer, served with a thick chocolate shake and a scoop of vanilla ice cream.
If you have been here a while, you will know that I have an obsession with chocolate and pie, and when I can combine these, it's just like a little slice of heaven on a plate for me. If you feel the same, then check out my French silk pie, chocolate ganache tarts, and Oreo tart.
Jump to:
⭐ Recipe Snapshot
⏱ Prep & Cook Time: 30 minutes prep time and 50 minutes cook time.
👩🍳 Skill Level: beginner to intermediate. You can simplify this recipe by using store-bought gluten-free pastry or pie crust.
🥄 Servings: 8 servings.
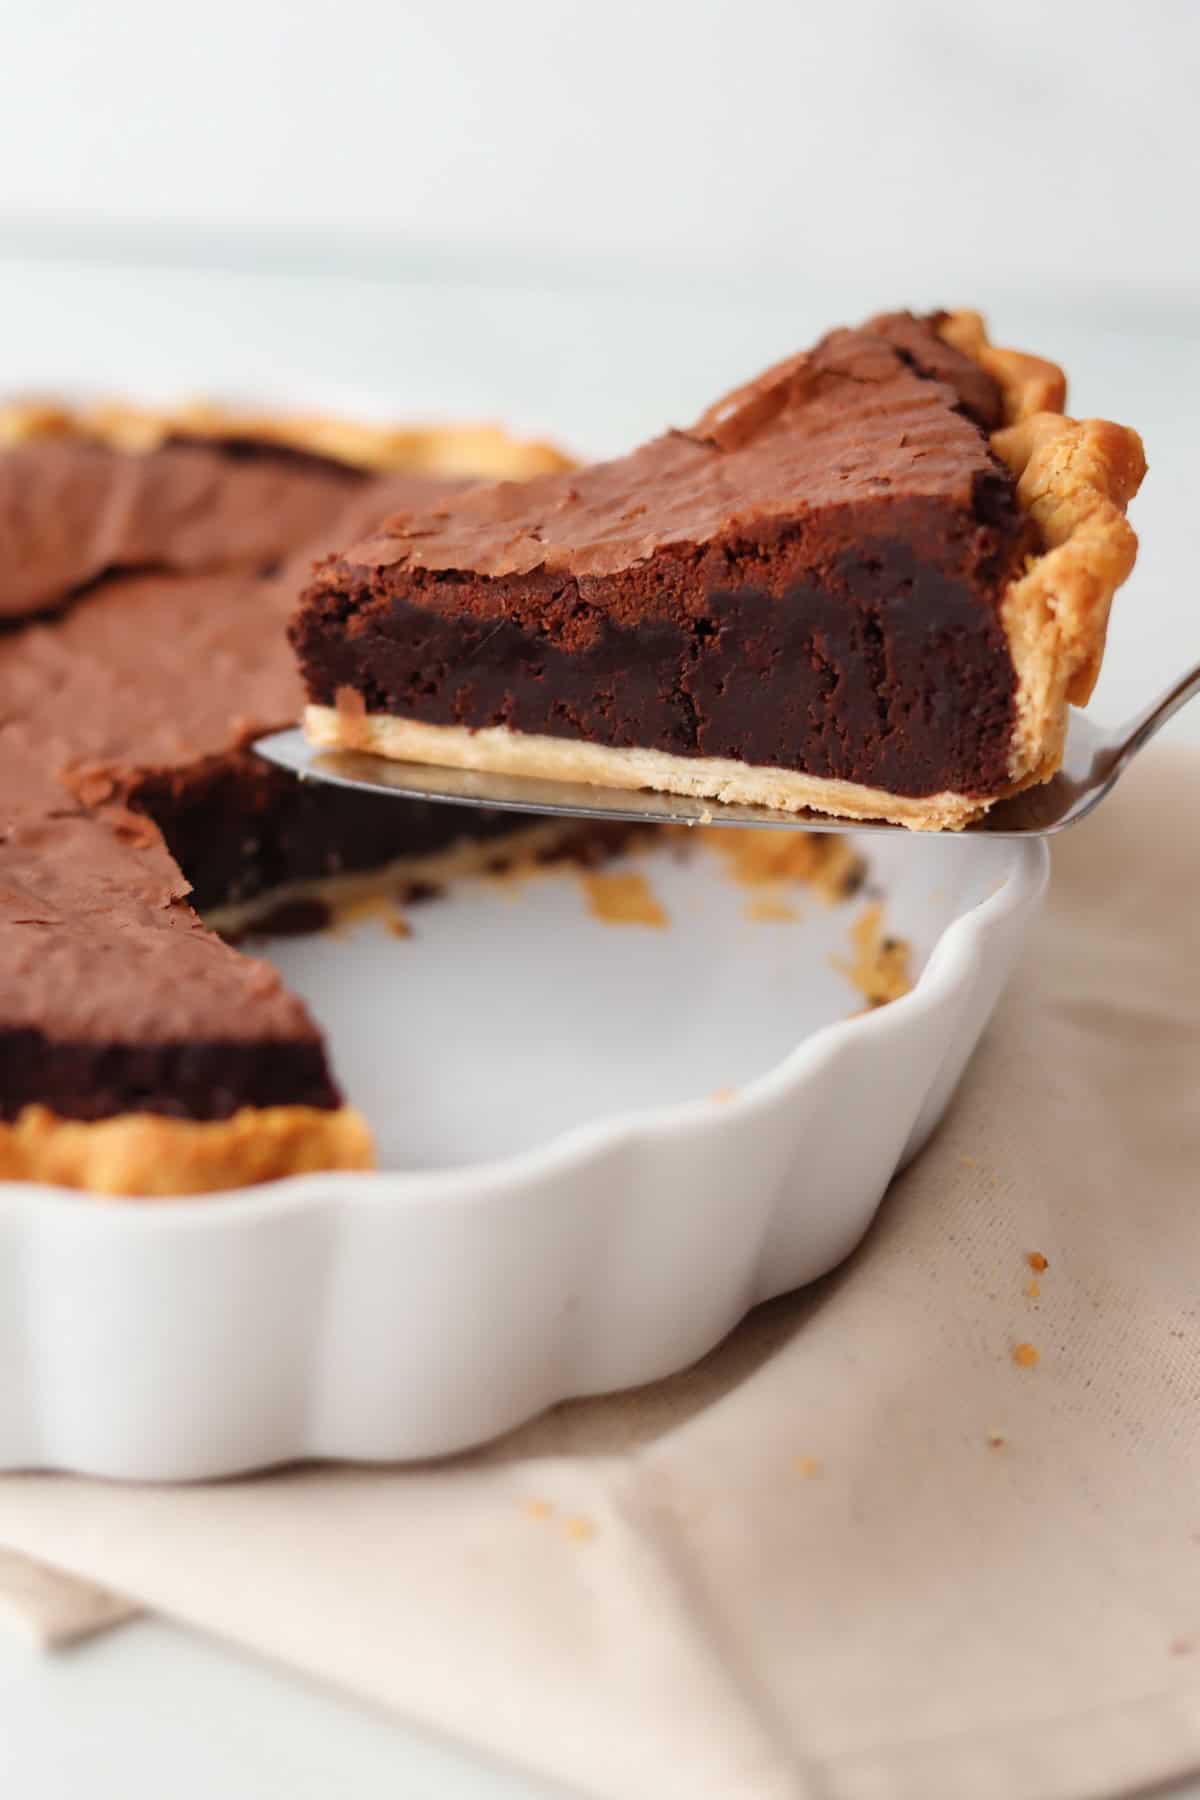
🍫 Flavors: rich, fudgy brownie filling encased in a homemade flaky buttery pie crust.
📖 Dietary Notes: gluten free, easily made dairy free.
❄️ Make Ahead: can be made up to 3-4 days in advance.
🍽️ Serving Suggestion: can be served warm or at room temperature. Pairs well with a drizzle of chocolate sauce, Chantilly cream, or a scoop of vanilla ice cream.
Recipe Development
I love combining two recipes into one. This is a combination of my gluten free pie crust and my gluten free fudge brownies, and you if you look around my website, you will find a few recipes that I have combined into one, such as my gluten free brookies and my carrot cake cheesecake.
My gluten free pie crust was a labor of love and took many recipe tests to get just right, and it has never failed me yet. I adapted my fudge brownie recipe for this pie as the original recipe contains just a little too much filling for the 9 inch pie dish, so I have adapted it to contain a little less filling.
If you are using a shallow pie dish, you may have a little extra filling. I recommend using this to fill cupcake holders and bake for little brownie bites. If you are using a deep 9-inch dish, you should have enough filling.
📋 Ingredients Notes
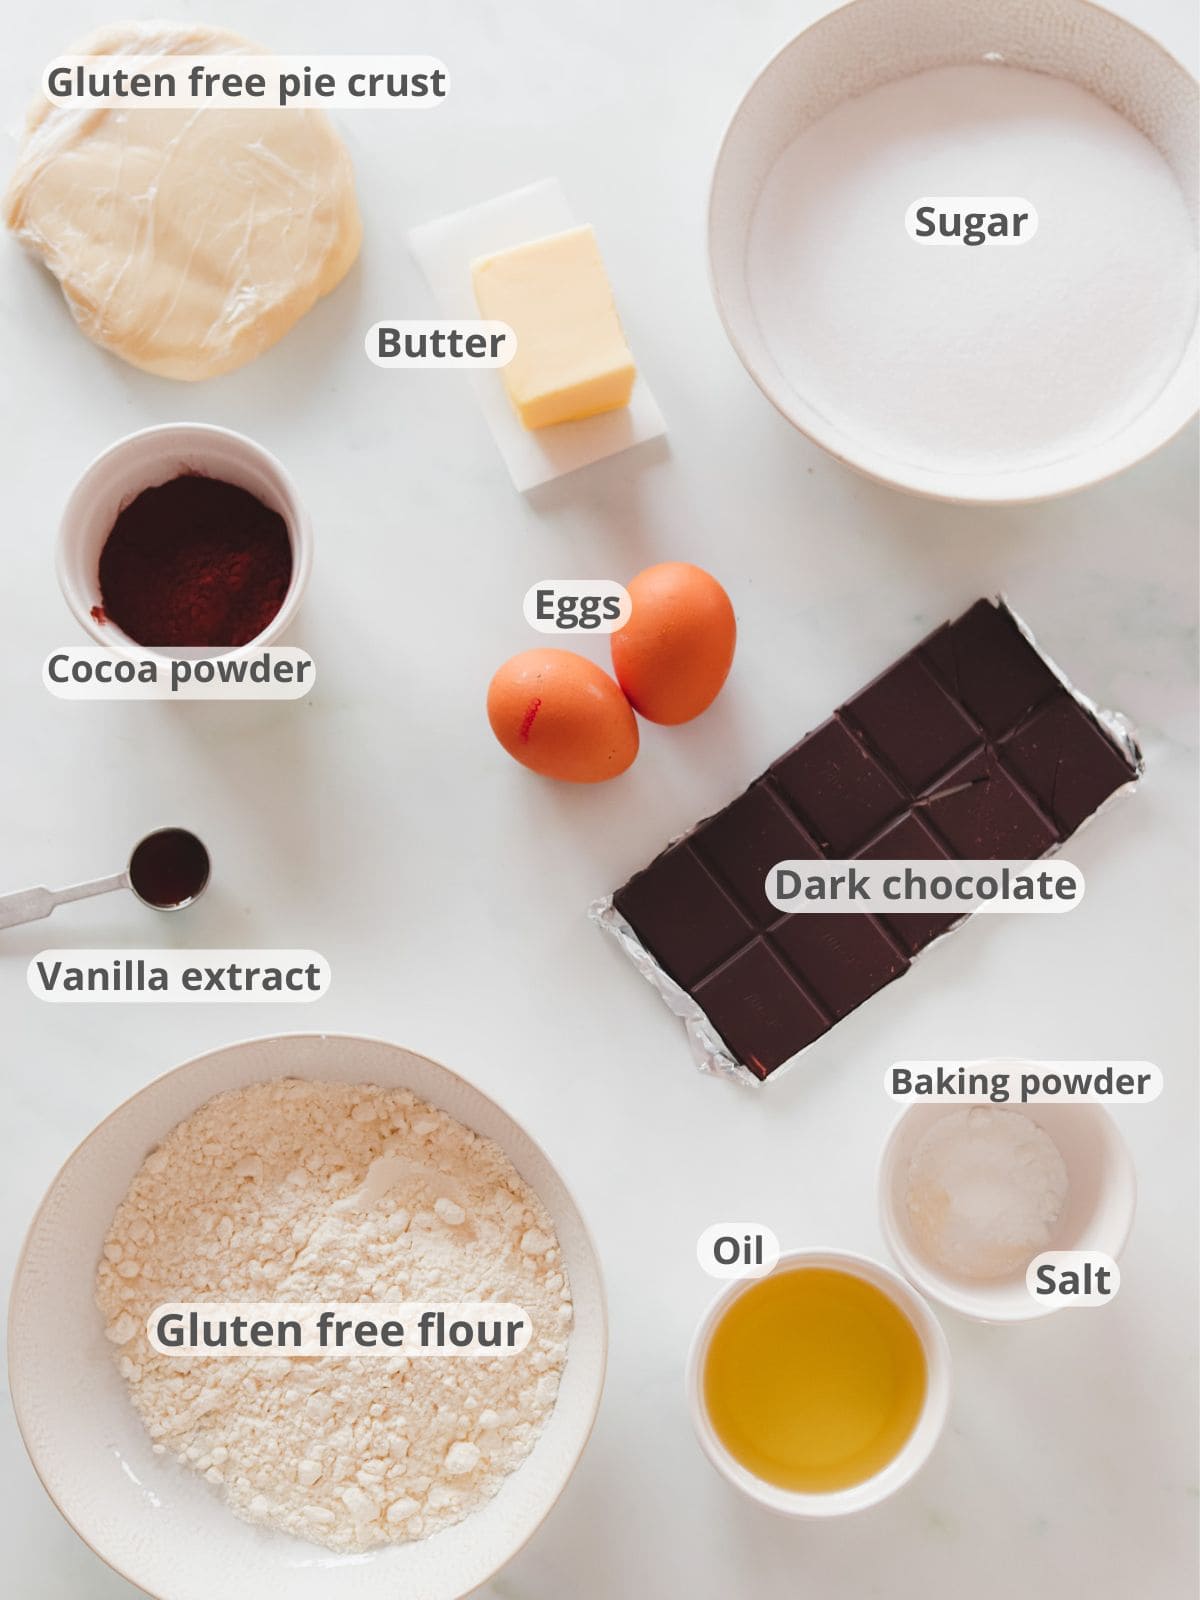
- Gluten free pie crust - I recommend using my gluten free pie crust recipe, but you can use your preferred pie crust.
- Dark chocolate - I used 75% dark chocolate. Always use high-quality chocolate and check that the chocolate used is gluten free as some brands may contain gluten.
- Butter - I use unsalted butter. If you only have salted butter available omit the additional salt from the recipe.
- Gluten free All-purpose flour - AKA Gluten free plain flour. I used Dove's free from plain flour, but you can use your preferred brand of gluten free All purpose flour.
- Cocoa powder - I used Dutch-processed cocoa powder and recommend using a good-quality cocoa powder when making brownies.
- Baking powder - Some brands may have ingredients that contain gluten. Always be sure to check the label.
- Xanthan Gum - omit if flour blend already contains xanthan gum.
- Salt - Adds depth, balance, and enhances all the flavors in the brownies.
- Eggs - Adds structure and stability to the brownies. Use room-temperature large eggs.
- Oil - Helps give that gluten-free fudgy chewy brownie texture. Use a neutral flavor oil like vegetable oil or canola oil.
- Vanilla extract - Adds additional flavor.
See the recipe card below for ingredient measurements.
⚡ Substitutions & Variations
- Dairy Free - to make a dairy-free brownie pie, use your preferred dairy free pie crust and substitute the butter and chocolate for your preferred dairy free brand.
- Pumpkin brownie pie - Why not add a swirl of pumpkin puree onto the top of the brownie pie, just like in my gluten free pumpkin brownies recipe.
- Oreo pie crust - If you love an Oreo pie crust, use my gluten free Oreo pie crust as a base.
🥣 Step by Step Instructions
Below is a brief, step-by-step process with photos on how to make a gluten-free brownie pie.
See the recipe card below for more detailed recipe instructions.
Make the Pie Crust
I usually make my gluten-free pie dough the day before and have it resting in the refrigerator.

Step 1: Roll out the pie dough evenly until it is around a 12-inch circle. To make rolling the pie dough easier, I like to roll it out on parchment paper or Plastic wrap. (This will prevent it from sticking, and there is no need for extra flour on your surface, which prevents the pastry from drying out. It also makes the dough easier to lift onto the pie dish by lifting the plastic wrap and then flipping it over the pie dish).
Step 2: Carefully transfer the dough without stretching it onto the 9-inch pie dish. Gently press the dough into the bottom and sides of the dish. Trim any excess dough around the edges of the pie dish, leaving around 1 inch around the edge of the dish. Fold and tuck the excess dough around the inner edge of the pie dish. This will make a neat, thicker crust around the edge of the pie that is easier to shape.
Place the pie dish in the fridge for 30 minutes for the pie dough to firm up.
Step 3: Preheat the oven to 220°C/425°F.
After the dough has chilled, using a fork, dock the base of the pie crust by pricking the bottom of the pie crust several times. This will allow steam to escape and help prevent it from puffing up, and helps the bottom stay flat in the dish.
Line the pie crust with parchment paper, leaving some overlap over the sides of the pie dish. Gently fill it using ceramic baking beads, uncooked rice, or beans. Be sure to get all the pie weights up to the edge of the crust.Bake in the oven for approximately 15-20 minutes until the edges of the pie crust are starting to turn a light golden brown
Step 4: Reduce the oven temperature to 190°C/375°F. Carefully remove the parchment paper and pie weights, and return the pie dish to the oven for a further 5 minutes. The bottom will be firm but not yet golden brown. Set the pie dish on a cooling rack while making the brownie filling.
Tip: Rolling the pastry between plastic wrap or parchment paper will prevent it from sticking, and there is no need for extra flour on your surface, which prevents the pastry from drying out. It also makes the dough easier to lift onto the pie dish by lifting the plastic wrap and then flipping it over the pie dish.
Make the Brownie Filling
Step 5: Reduce the oven to oven to 175°C/325°F/Gas mark 3.
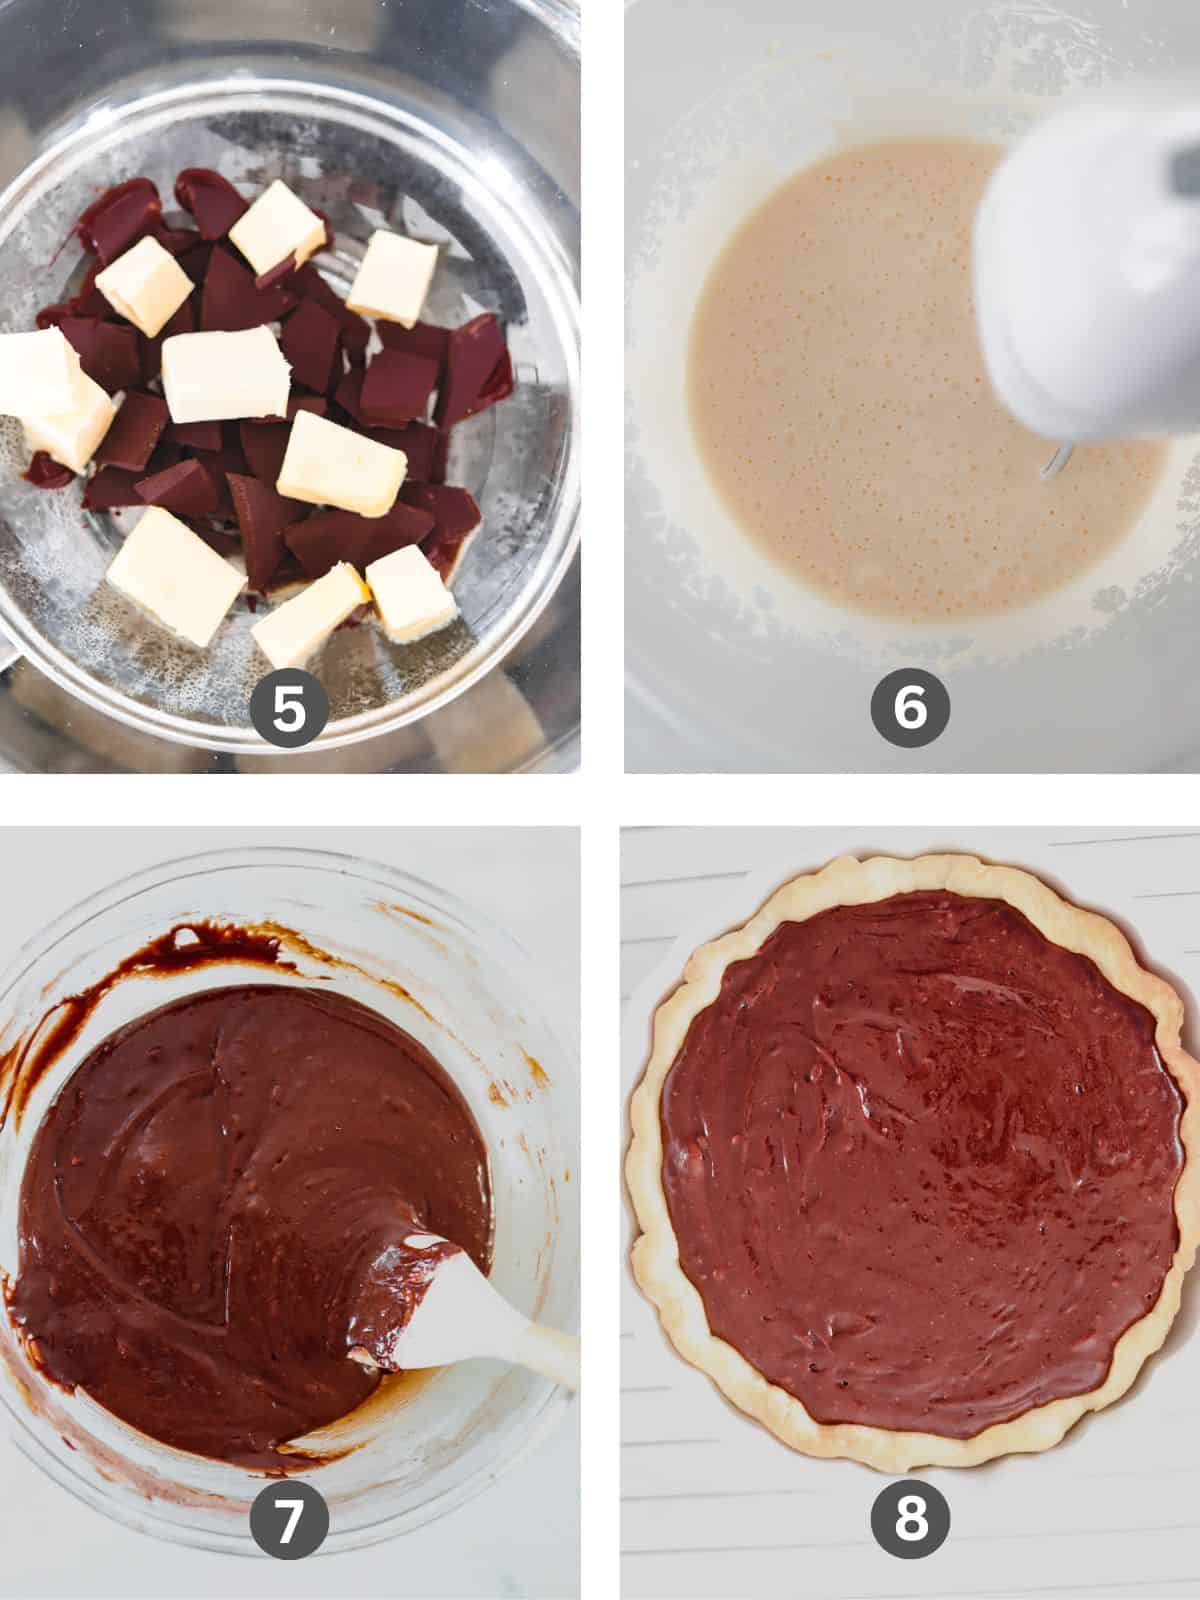
Gently melt the chocolate and butter together in a bain-marie (by half-filling a pan with hot water with a bowl on top) over low/medium heat until the chocolate and butter have melted. Set aside to cool slightly.
Mix flour, cocoa powder, baking powder, xanthan gum, and salt, and set aside
Step 6: With an electric whisk or stand mixer, whisk the eggs and sugar together for at least 5 minutes until the egg and sugar mixture looks nice and frothy (This will help get that shiny brownie top). Add the oil and vanilla extract. Add the melted chocolate mixture to the whipped eggs and oil mixture. Mix until fully combined.
Step 7: Add the flour mixture to the wet ingredients and fold in gently until there are no lumps and the mixture is smooth.
Pour the brownie batter into the par-baked pie crust and spread it out evenly. Tap the pie dish on the counter to release any air bubbles.
Step 8: Place the pie dish back in the oven and bake for 25-30 minutes until a skewer inserted into the brownie comes out almost clean, with some pieces of brownie on the skewer, it is ready (Do not overbake).
Move the pie dish to a cooling rack. When the gluten free brownie pie is cool, cover and place it in the refrigerator for 30 minutes.
Store in an airtight container at room temperature. This pie can be served straight from the fridge, at room temperature, and reheated to have a warm brownie pie.
Tip: Whisking the eggs and sugar together well until they become really frothy will help achieve that shiny brownie top. The sugar in the recipe will melt and caramelize on top of the brownie as it bakes, creating a shiny, crisp layer.

💡 Pro Recipe Tips
- Tip #1: Weighing the ingredients - Using a digital scale makes all the difference in baking. I use it in all my recipes as it's the most accurate. If you don't have a scale, you can easily purchase one cheaply online.
- Tip #2: Rolling the pastry between plastic wrap or parchment paper will prevent it from sticking, and there is no need for extra flour on your surface, which prevents the pastry from drying out. It also makes the dough easier to lift onto the pie dish by lifting the plastic wrap and then flipping it over the pie dish.
- Tip #3: How to get that shiny brownie top - To get that beautiful crisp shiny top on your brownies, make sure that your eggs are at room temperature and that you whisk them well with the sugar. I usually whisk for around 5 minutes to be sure that they are well whipped and that plenty of air has been added throughout the eggs.
- Tip #4: The key is to not overbake the brownie filling and remove the pie from the oven just as the skewer comes out almost clean but not dry.
❔ Recipe FAQs
This gluten free brownie pie can be stored in an airtight container.
Yes, you can make this pie up to two days before you want to serve it. I like to make it the day before.
To make a dairy free brownie pie, use your preferred dairy free pie crust and substitute the butter and chocolate for your preferred dairy free brand.
Other brownie recipes that are also delicious are gluten free brown butter brownies, gluten free creme egg brownies, and gluten free pumpkin brownies.
More Gluten Free Pie Recipes


If you tried this Gluten free brownie pie recipe. Please leave a star 🌟rating in the recipe card below & a review in the comments section further down the page. Subscribe and get free recipes straight to your inbox.
📖 Recipe

Gluten Free Brownie Pie
Nutritional information is meant as a guideline and all information is approximate.
Equipment
- 9 inch pie dish
Ingredients
Pie crust - I usually make my gluten-free pie dough the day before and have it resting in the refrigerator.
- 1 Gluten free pie dough (I used my gluten free pie crust recipe)
Brownie Filling
- 100 grams Dark chocolate (I used 75% dark chocolate) Always check that the chocolate used is gluten free as some brands may contain gluten.
- 100 grams Unsalted butter
- 90 grams Gluten free All-purpose flour
- 30 grams Dutch processed cocoa powder
- 1 teaspoon Baking powder Some brands may have ingredients that contain gluten. Always be sure to check the label.
- ¼ teaspoon Xanthan Gum omit if flour blend already contains xanthan gum.
- ¼ teaspoon Salt
- 2 large Eggs room temperature
- 200 grams Sugar
- 80 milliliters Oil Use a neutral-flavored oil such as canola or vegetable oil.
- 1 teaspoon Vanilla extract
Instructions
Pie crust
- I usually make my gluten-free pie dough the day before and have it resting in the refrigerator.
- Roll out the pie dough evenly until it is around a 12-inch circle. To make rolling the pie dough easier, I like to roll it out on parchment paper or Plastic wrap. (This will prevent it from sticking, and there is no need for extra flour on your surface, which prevents the pastry from drying out. It also makes the dough easier to lift onto the pie dish by lifting the plastic wrap and then flipping it over the pie dish).
- Carefully transfer the dough without stretching it onto the 9-inch pie dish. Gently press the dough into the bottom and sides of the dish. Trim any excess dough around the edges of the pie dish leaving around 1 inch around the edge of the dish. Fold and tuck the excess dough around the inner edge of the pie dish. This will make a neat, thicker crust around the edge of the pie that is easier to shape.
- Preheat the oven to 220°C/425°F.
- After the dough has chilled, using a fork, dock the base of the pie crust by pricking the bottom of the pie crust several times. This will allow steam to escape and help prevent it from puffing up and helps the bottom stay flat in the dish.
- Line the pie crust with parchment paper, leaving some overlap over the sides of the pie dish. Gently fill it using ceramic baking beads, uncooked rice, or beans. Be sure to get all the pie weights up to the edge of the crust.Bake in the oven for approximately 15-20 minutes until the edges of the pie crust are starting to turn a light golden brown.
- Reduce the oven temperature to 190°C/375°F.Carefully remove the parchment paper and pie weights, and return the pie dish to the oven for a further 5 minutes. The bottom will be firm but not yet golden brown. Set the pie dish on a cooling rack while making the brownie filling.
Brownie filling
- Reduce the oven to oven to 175°C/325°F/Gas mark 3.
- Gently melt the chocolate and butter together in a bain-marie (by half-filling a pan with hot water with a bowl on top) over low/medium heat until the chocolate and butter have melted. Set aside to cool slightly.
- Mix flour, cocoa powder, baking powder, xanthan gum, and salt, and set aside.
- With an electric whisk or stand mixer, whisk the eggs and sugar together for at least 5 minutes until the egg and sugar mixture looks nice and frothy (This will help get that shiny brownie top). Add the oil and vanilla extract. Add the melted chocolate mixture to the whipped eggs and oil mixture. Mix until fully combined.
- Add the flour mixture to the wet ingredients and fold in gently until there are no lumps and the mixture is smooth.
- Pour the brownie batter into the par-baked pie crust and spread it out evenly. Tap the pie dish on the counter to release any air bubbles.
- Place the pie dish back in the oven and bake for 25-30 minutes until a skewer inserted into the brownie comes out almost clean, with some pieces of brownie on the skewer, it is ready (Do not overbake).
- Move the pie dish to a cooling rack. When the gluten free brownie pie is cool, cover and place it in the refrigerator for 30 minutes.
- Store in an airtight container at room temperature. This pie can be served straight from the fridge, at room temperature, or reheat a slice in the microwave to have a warm brownie pie.
Notes
- Tip #1: Weighing the ingredients - Using a digital scale makes all the difference in baking. I use it in all my recipes as it's the most accurate. If you don't have a scale, you can easily purchase one cheaply online.
- Tip #2: Rolling the pastry between plastic wrap or parchment paper will prevent it from sticking, and there is no need for extra flour on your surface, which prevents the pastry from drying out. It also makes the dough easier to lift onto the pie dish by lifting the plastic wrap and then flipping it over the pie dish.
- Tip #3: How to get that shiny brownie top - To get that beautiful crisp shiny top on your brownies, make sure that your eggs are at room temperature and that you whisk them well with the sugar. I usually whisk for around 5 minutes to be sure that they are well whipped and that plenty of air has been added throughout the eggs.
- Tip #4: The key is to not overbake the brownie filling and remove the pie from the oven just as the skewer comes out almost clean but not dry.
Nutrition
Disclaimer
Nutritional information is meant as a guideline and is always an approximate calculation. Recipes may include information of various products used. It is your responsibility to check that ingredients you use when making a recipe are gluten free.


Amanda says
Thank you for visiting. I hope you love the recipe!