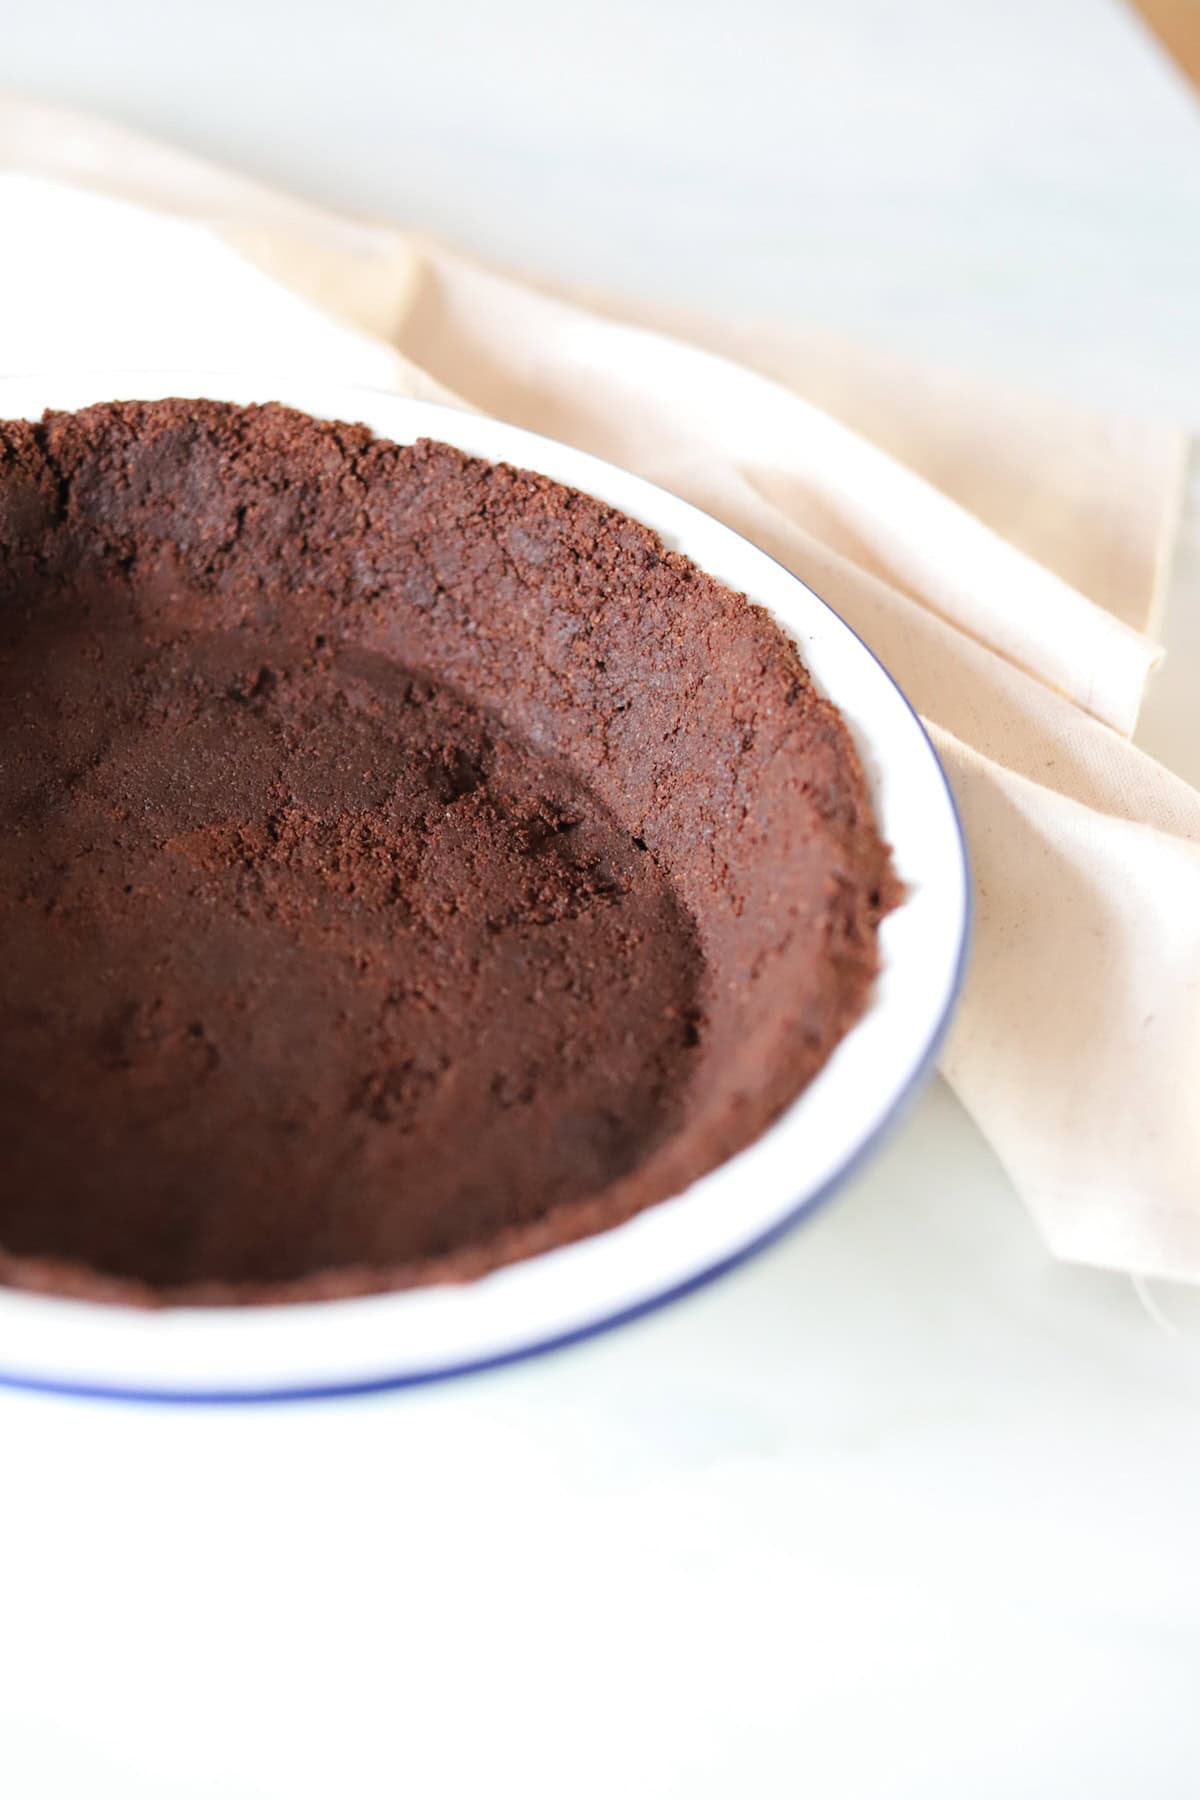
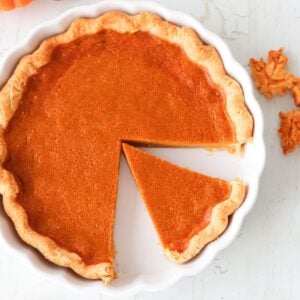
This Homemade Gluten Free Oreo Pie Crust is super easy to make and only requires two ingredients. Ready in only 20 minutes and can be made in advance. Suitable for an 8, 9, or 10-inch pie dish or cheesecake base.
Some desserts are just elevated by using an Oreo pie crust. I love using it in my Billy Miners Pie, which is filled with coffee-flavored ice cream, Oreo tart, and French silk pie instead of using a gluten free pie crust to make it a no-bake dessert.
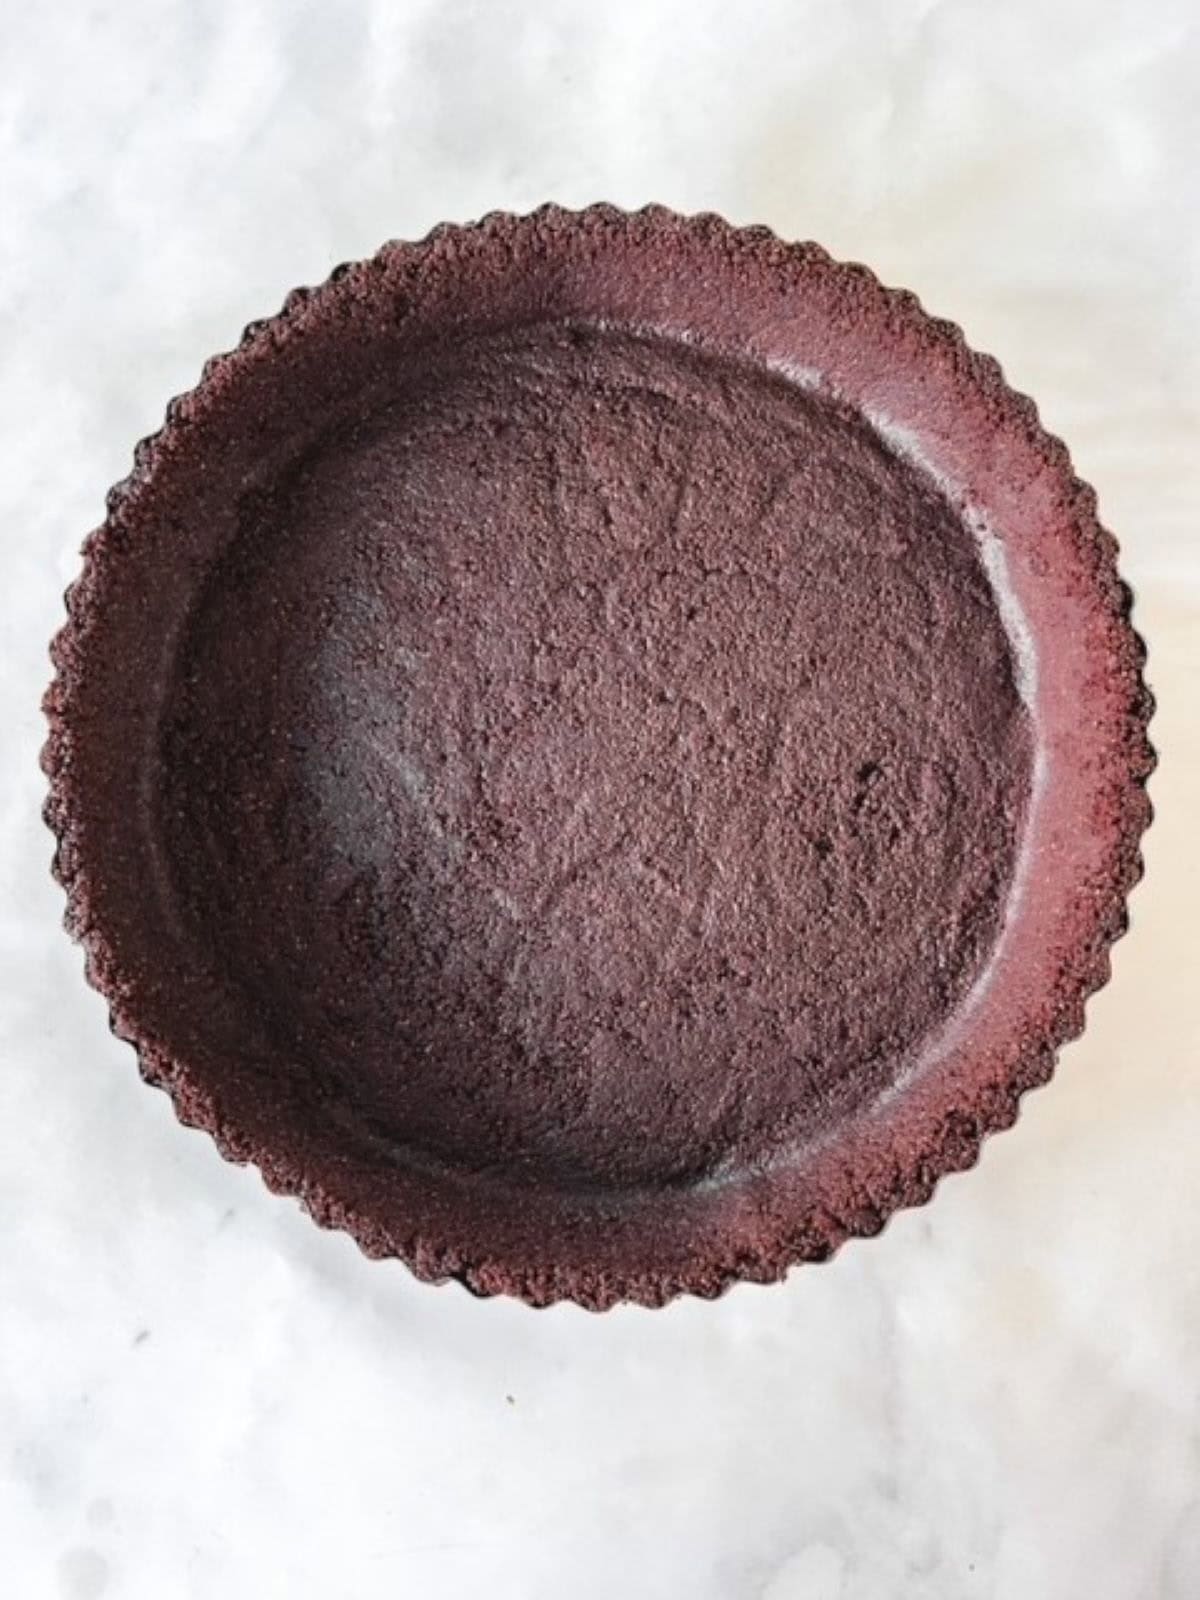
I have used this as a base for cheesecakes, and this didn't require any pre-baking. I have also used it for a gluten free no-bake cheesecake when I fancy a change from a regular cheesecake base.
Jump to:
📸 Recipe Snapshot
⏱ Prep & Cook Time: Only 10 minutes of hands-on time.
👩🍳 Skill Level: Beginner-friendly. This recipe is super easy.
🥄 Servings: Suitable for an 8, 9, or 10-inch pie dish or cheesecake base.
🍪 Flavors: Chocolate and vanilla cream cookie base.
📖 Dietary Notes: Gluten free and easily made dairy free.
❄️ Make Ahead: Perfect for making ahead of time.
🍽️ Serving Suggestion: makes a great base for no bake pies, baked pies, tarts and as a cheesecake base.
📋 Ingredients Notes
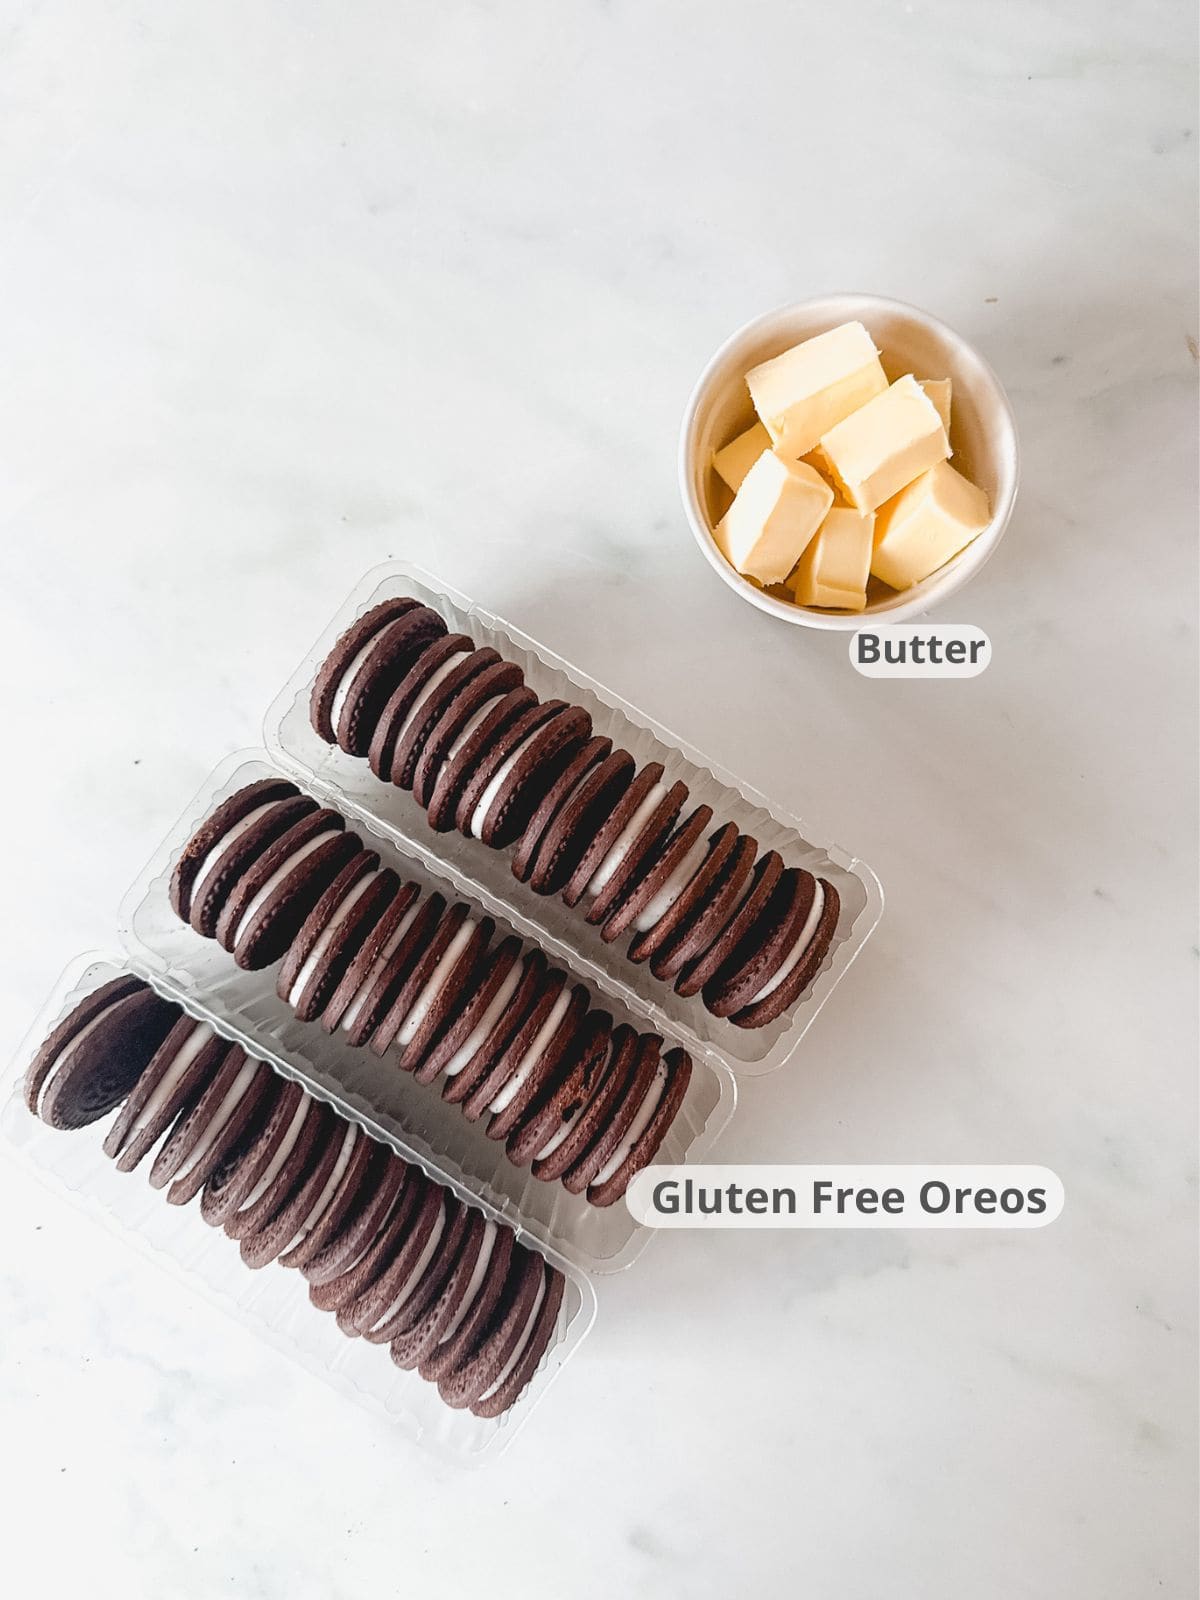
- Gluten free Oreo cookies - I have tested this recipe using Gluten free Oreo cookies, but have also used Tesco's gluten-free cookies and cream cookies. Most gluten free copy cat Oreo cookies should work well if they have a similar weight to the Oreo cookie. I haven't tested this recipe using golden Oreo cookies.
- Butter - I used unsalted butter, but slightly salted butter will also be fine. I cut the butter into cubes before transferring it to the microwave.
See the recipe card below for ingredient measurements.
⚡ Substitutions & Variations
- Mint Oreo Cookies - If you think that the mint flavor will work well with your filling of choice then they will be a great option.
- Dairy Free - Use your preferred dairy free butter block.
🥣 Step by Step Instructions
Below is a brief step-by-step process with photos of how to make a gluten free Oreo pie crust.
See the recipe card below for more detailed recipe instructions.
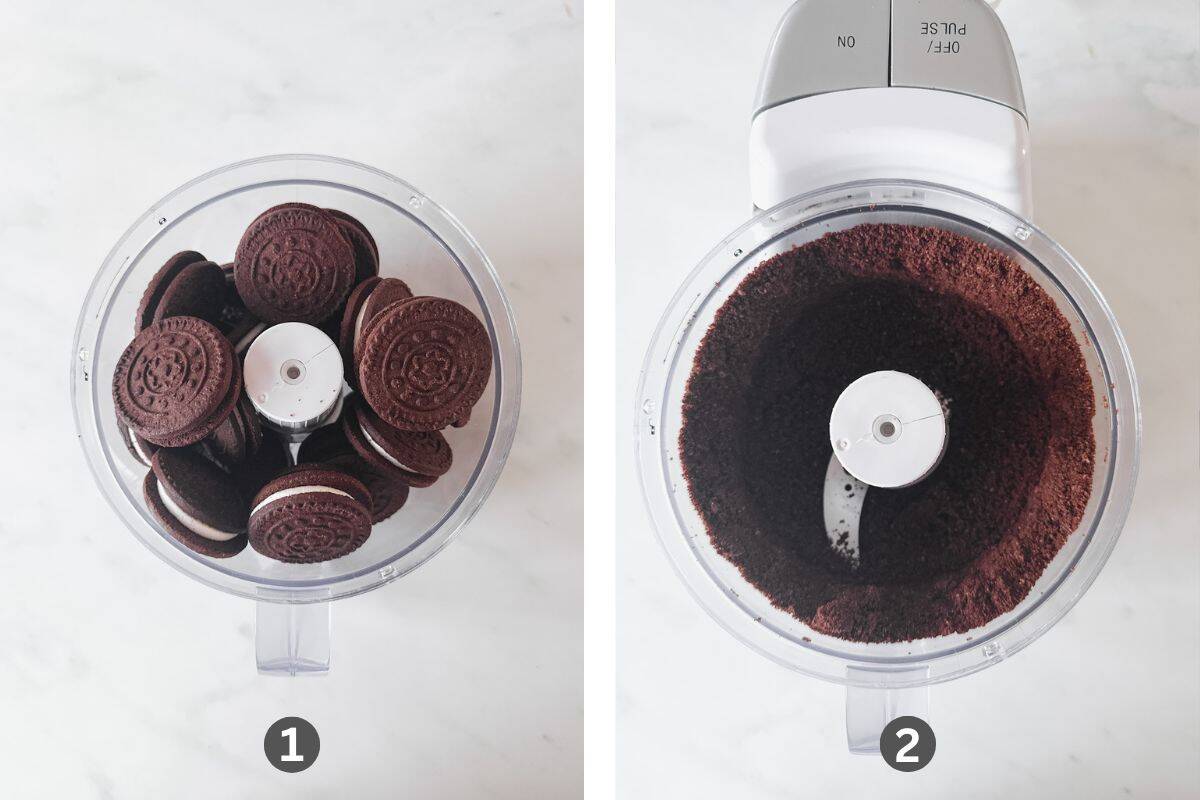
Step 1 & 2: Place the Oreo cookies in a food processor. Blend until they resemble fine crumbs.
Step 3: Melt the butter in short bursts in the microwave.
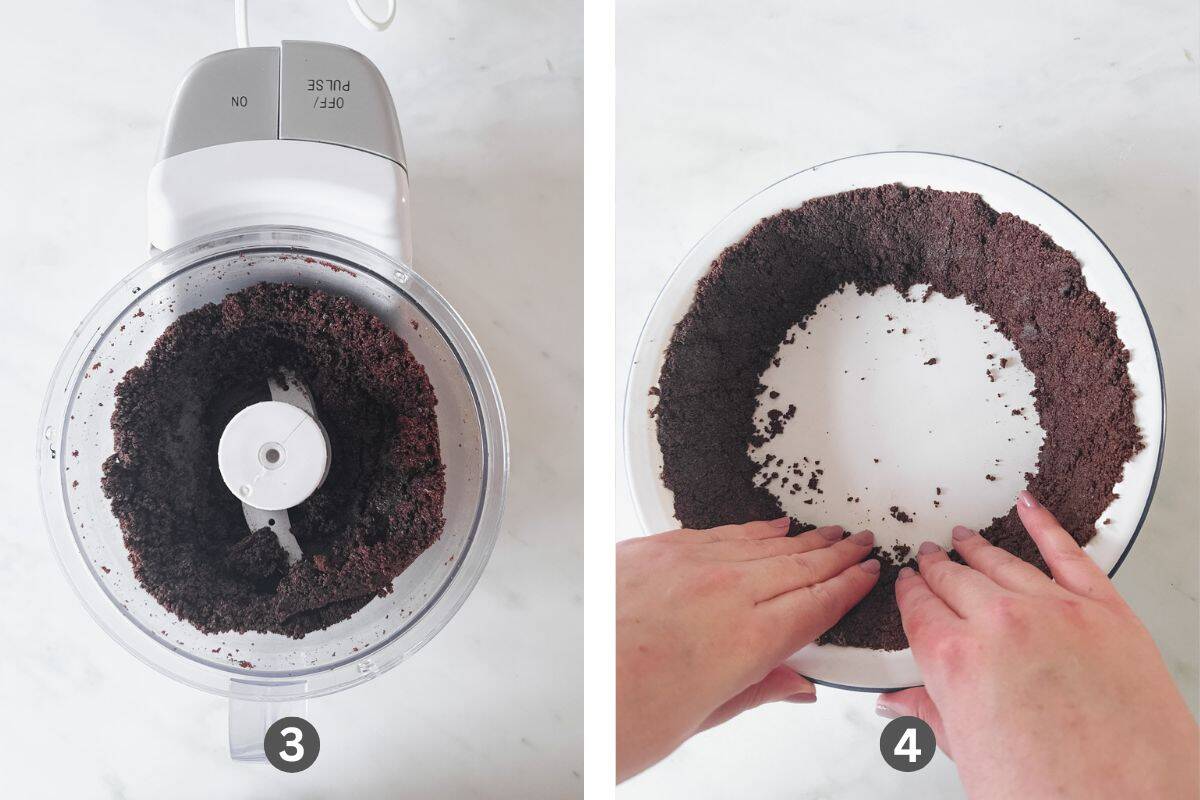
Add the melted butter to the Oreo crumbs and mix it well until it is fully combined with the Oreo crumbs.
Step 4: Place half of the Oreo mix into the pie dish, and using your hands, firmly pack the crumbs around the sides of the pie dish.
Tip: Packing the sides of the dish first will make it easier to get an even pie crust.
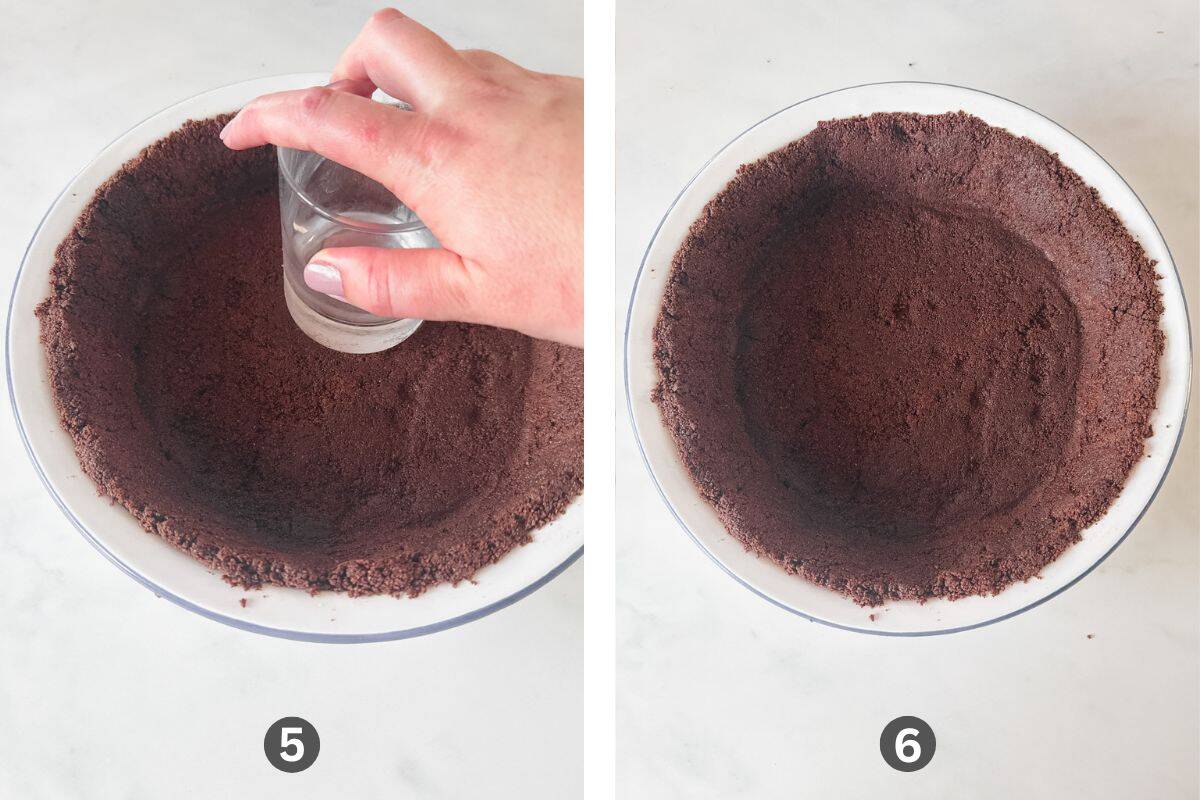
Step 5: Add the remaining Oreo crumbs into the pie dish and pack firmly on the bottom of the dish. I used a glass to help pack it firmly.
Step 6: For Baked Desserts - Preheat the oven to 350℉/180℃Bake for 10 minutes. Place on a cooling rack and wait until the pie crust has fully cooled before adding the filling.
For No-Bake Desserts - Place the pie crust in the refrigerator for at least 1 hour to set.
Tip: This recipe is suitable for baked or no-bake recipes. 8, 9, and 10-inch pie dishes or springform baking pan. I have used it for cheesecake bases, tart bases, and pie crusts.
💡 Pro Recipe Tips
- Tip #1: Packing the sides of the dish first will make it easier to get an even pie crust.
- Tip #2: This recipe is suitable for baked or no-bake recipes. 8, 9, and 10-inch pie dishes or springform baking pan. I have used it for cheesecake bases, tart bases, and pie crusts.
- Tip #3: To bake or not to bake - baking is optional depending on the recipe filling that you are using.
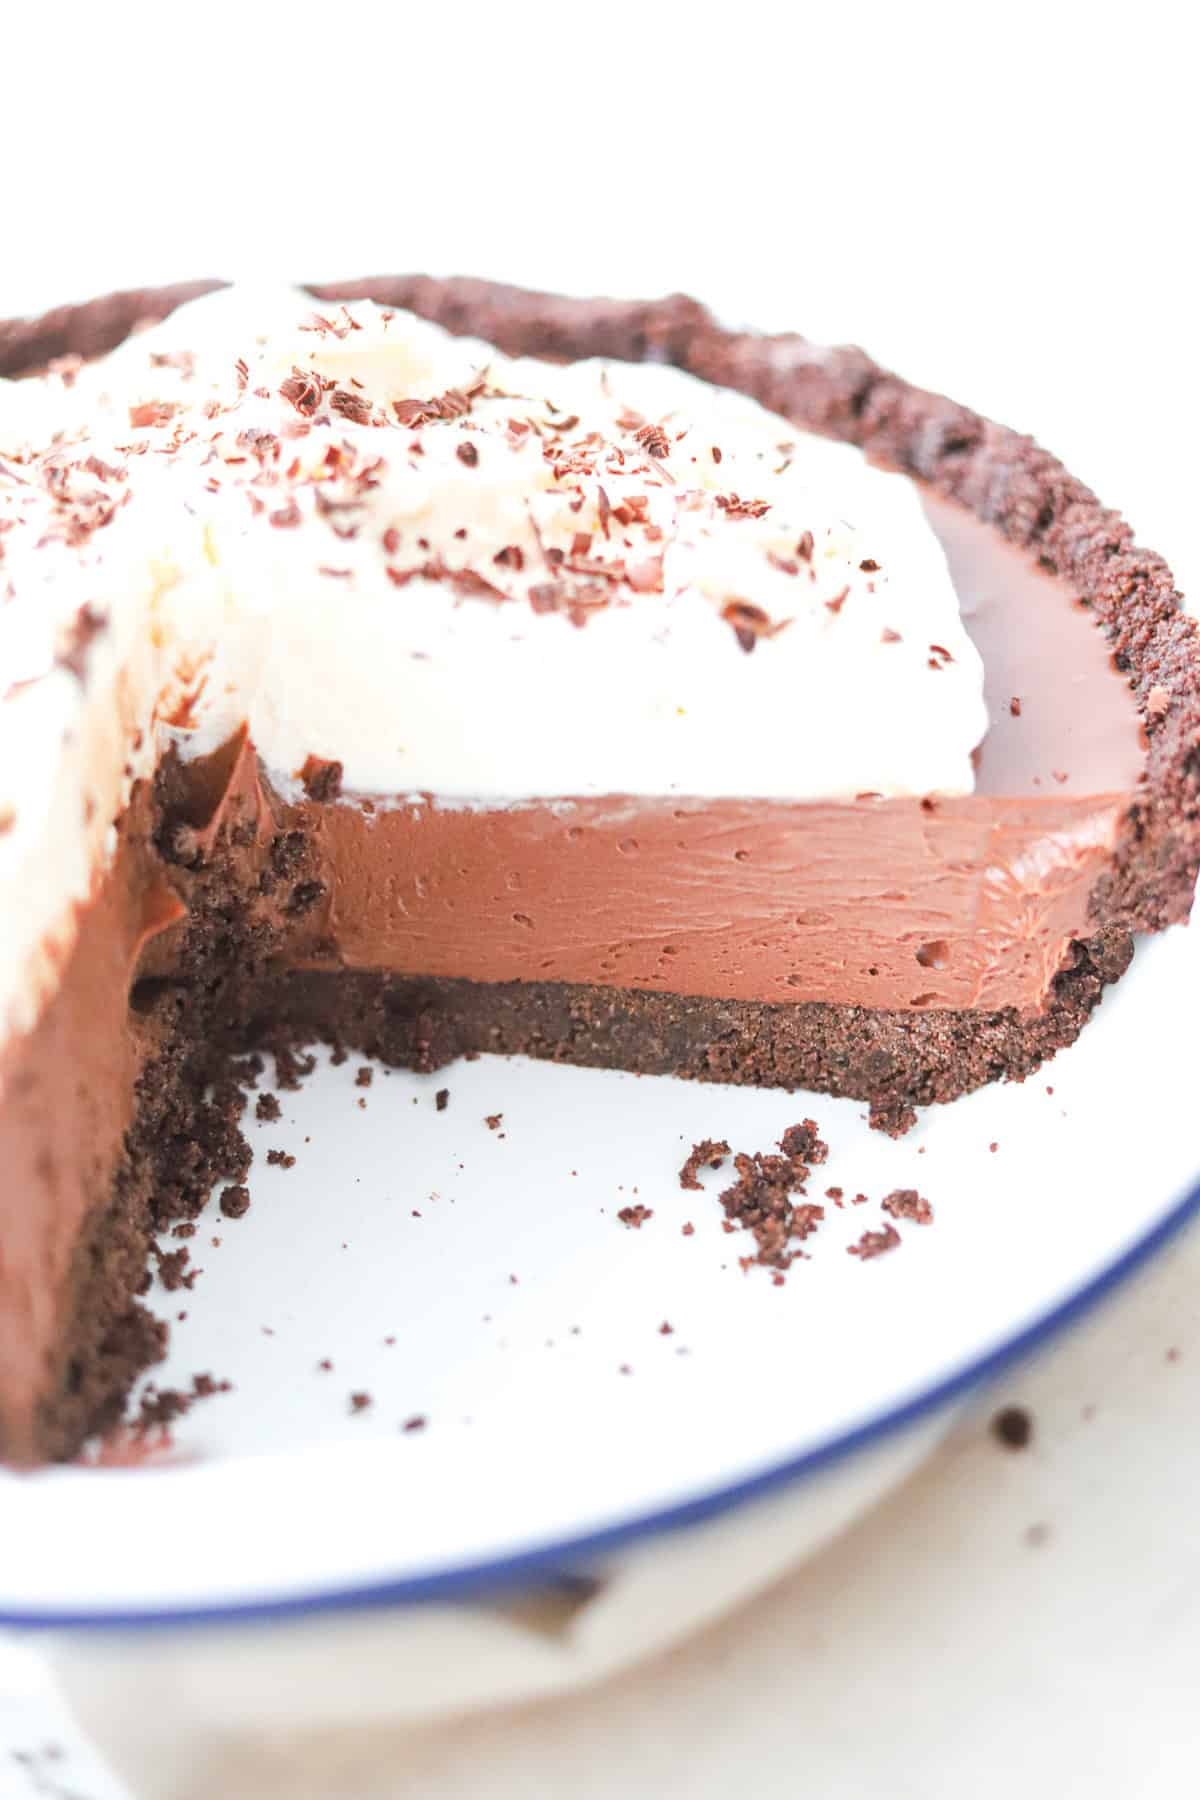
Above is a photo of the Oreo pie crust used in a chocolate French silk pie.
❔ Recipe FAQs
The Oreo pie crust can be stored in the refrigerator for up to 2 days before you use it in a recipe. This makes it a great make ahead crust.
You can make the Oreo crust a few days in advance or keeping the Oreo crust in the pie dish, cover, and freeze it for up to 3 months. Thaw in the fridge before using.
Yes, use your preferred dairy free butter block.
More gluten free Oreo recipes


This is the base I used in my Oreo tart
If you tried this Gluten free Oreo pie crust recipe. Please leave a star 🌟rating in the recipe card below & a review in the comments section further down the page. Subscribe and get free recipes straight to your inbox.
📖 Recipe

Gluten Free Oreo Pie Crust
Nutritional information is meant as a guideline and all information is approximate.
Ingredients
Ingredients for Oreo pie crust
- 24 Gluten free Oreo cookies
- 80 grams (5 tablespoons) Butter
Instructions
How to make Oreo pie crust
- Place the Oreo cookies in a food processor.
- Blend until they resemble fine crumbs.
- Melt the butter in short bursts in the microwave.
- Add the melted butter to the Oreo crumbs and mix it well until it is fully combined with the Oreo crumbs.
- Place half of the Oreo mix into the pie dish, and using your hands, firmly pack the crumbs around the sides of the pie dish.
- Add the remaining Oreo crumbs into the pie dish and pack firmly on the bottom of the dish. I used a glass to help pack it firmly.
- This recipe is suitable for baked or no-bake recipes. 8, 9, and 10-inch pie dishes or springform baking pan. I have used it for cheesecake bases, tart bases, and pie crusts.
- For Baked Desserts - Preheat the oven to 350℉/180℃Bake for 10 minutes. Place on a cooling rack and wait until the pie crust has fully cooled before adding the filling.
- For No-Bake Desserts - Place the pie crust in the refrigerator for at least 1 hour to set.
Notes
- Tip #1: Packing the sides of the dish first will make it easier to get an even pie crust.
- Tip #2: This recipe is suitable for baked or no-bake recipes. 8, 9, and 10-inch pie dishes or springform baking pan. I have used it for cheesecake bases, tart bases, and pie crusts.
- Tip #3: To bake or not to bake - baking is optional depending on the recipe filling that you are using.
Nutrition
Disclaimer
Nutritional information is meant as a guideline and is always an approximate calculation. Recipes may include information of various products used. It is your responsibility to check that ingredients you use when making a recipe are gluten free.


Amanda says
Thank you for visiting. I hope you liked the recipe.